Do you want to add a glossary or dictionary section in your WordPress site? A glossary section has all the terms and abbreviations related to your business, so you can easily explain industry topics to your customers. This helps you earn trust and position yourself as an industry leader. In this article, we will show you how to add a glossary or dictionary section to your WordPress site.
What is a Glossary or Dictionary?
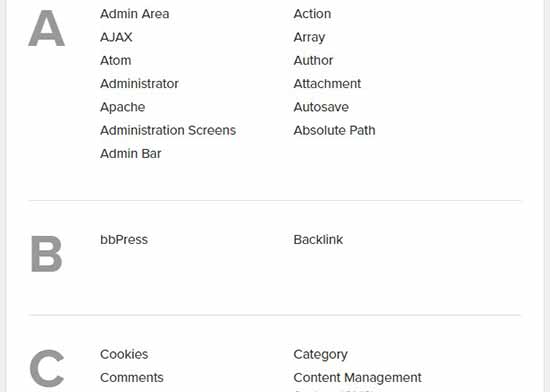
A glossary or dictionary has definitions of terms listed in the alphabetical order on a specific subject. It shows keyword and explanation like a general dictionary which helps users find the meaning of a specific term, phrase, or abbreviation.
You can refer to WPBeginner’s WordPress Glossary to get an idea of how a typical glossary or dictionary looks like.
With that said, let’s take a look on how to easily add a glossary or dictionary section on your WordPress site.
Adding a Glossary or Dictionary on your WordPress Site
The first thing you need to do is to install and activate the CM Tooltip Glossary plugin.
Upon activation, you’ll be automatically redirected to the plugin’s settings page.
Under the ‘General Settings’ tab, you can select a page to display glossary terms, set glossary page URL, and manage the highlighting options for glossary terms. You can also enable the case-sensitive option for your glossary.
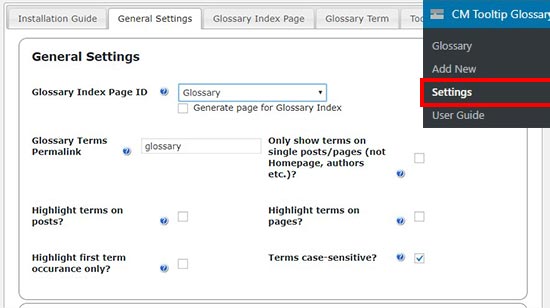
If your site doesn’t have a glossary page, then you can enable the ‘Generate Page for Glossary Index’ option to create a new page for your glossary. By default, the glossary page URL will be ‘yoursite.com/glossary’.
If you change the glossary permalink settings on this page, then you can use your new slug (keyword) to view the glossary page.
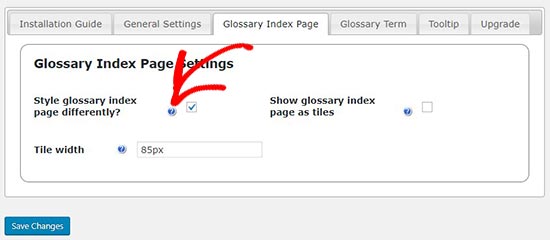
Once you are done, click on the ‘Save Changes’ button to store these settings.
Next, you need to visit the ‘Glossary Index Page’ tab to configure your glossary display settings.
Each option has a question mark icon next to it. You can hover on this icon to see what each specific option does.
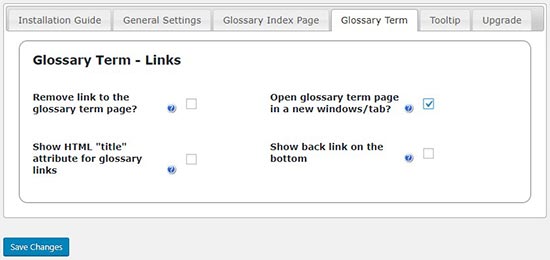
After that, you need to switch to the ‘Glossary Term’ tab to manage link settings for your glossary. You have the option to ‘Open glossary term page in a new window/tab’. While we don’t think it creates a good user experience, you can choose the settings that best fit your need.
Adding a New Glossary Term
Now that you have configured glossary settings, you are ready to start adding glossary terms and their definition.
Simply go to CM Tooltip Glossary » Add New page in your WordPress admin area to add a new glossary term.
First, you need to provide a title for your glossary term and then write the description in the text editor. Once you’re done writing the details, click on the ‘Publish’ button.

You can add as many glossary terms as you want, and they’ll be automatically arranged in the alphabetical order on your glossary page. It also allows you to start the glossary term title with numbers and display them before the alphabetical terms on the glossary page.
After adding a few terms, you can visit your WordPress site to see the glossary page in action.
Note: The glossary/dictionary page URL is the same that you created in the general settings above.
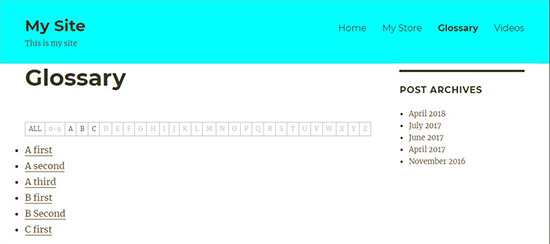
If you have hundreds of glossary terms, then your users can click on any alphabet or numerical value above to easily view the specific terms on the dictionary page.
That’s all. We hope this article helped you learn how to add a glossary or dictionary on your WordPress site.
