
Do you want to add a Google Calendar to your WordPress site? Google Calendar is one of the most useful apps. It allows you to manage your schedule, share events, and organize everything around you. In this article, we will show you how to add a Google Calendar in WordPress.
However, if you just want to follow text-instructions, then you can follow our step by step tutorial on how to How to add Google Calendar in WordPress.
The first thing you need to do is install and activate the Simple Calendar – Google Calendar Plugin. Upon activation, you need to visit Calendars » Settings page to configure the plugin.
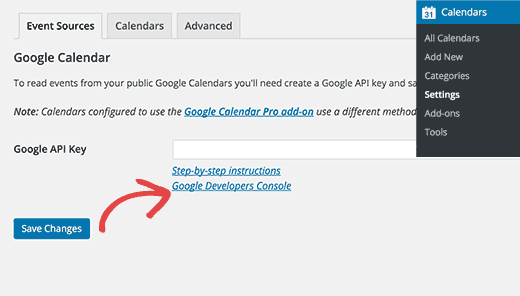
First, you need to connect the plugin to your Google Calendar. This requires giving the plugin access to your calendar data. For that, you need to create and provide a Google API Key.
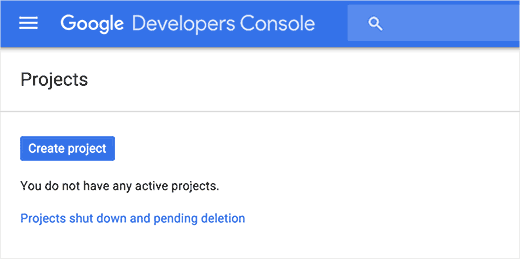
Simply visit Google Developer Console website and click on create new project button.
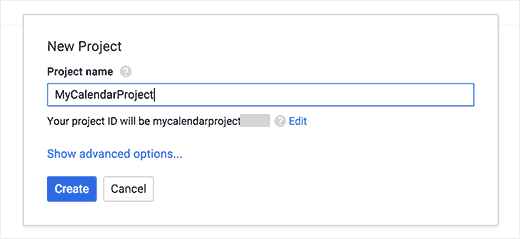
This will bring up a popup where you need to provide a name for your project. It could be anything you want, but we recommend using something that helps you identify the project.
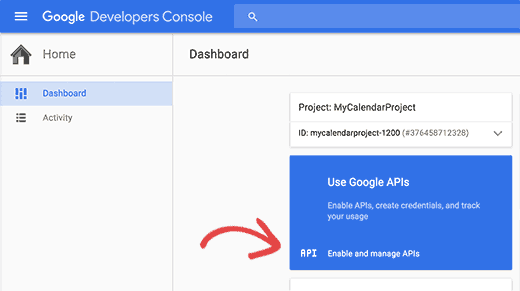
You will now be redirected to your project dashboard where you need to click on the Enable and Manage API Keys link.
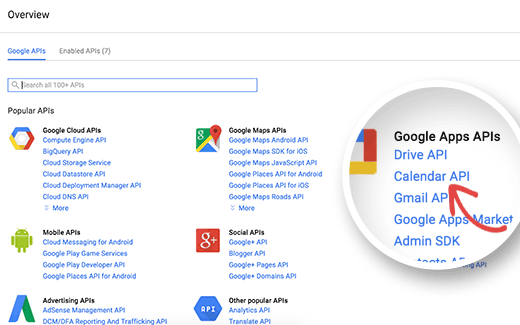
You will be brought to a page showing all the Google products and services. You need to click on the Google Calendar API located under the Google Apps APIs section.
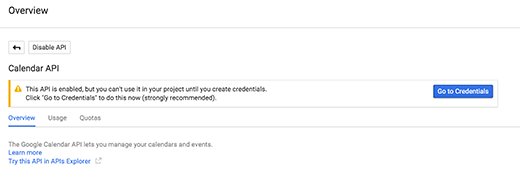
On the next page, you will be asked to confirm that you want to enable the Calendar API. Simply click on the Enable button to continue,

While your API is now enabled, you still need the details o how you would access the API and what credentials you will be using. Click on the go to credentials button to continue.
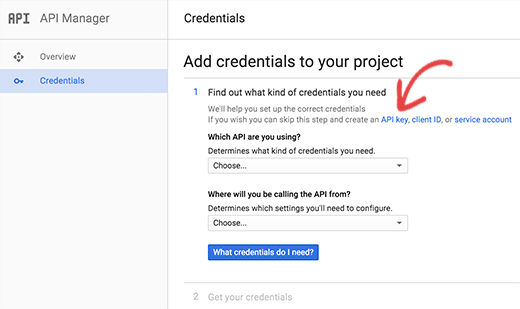
This will bring you to a page where you need to choose the credentials. We will be using the API key as the credential to connect Google Calendar to WordPress. Click on the API key link to proceed.
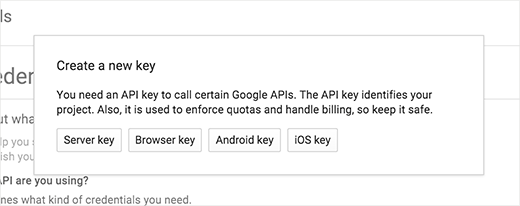
You will be now asked to choose where you will be using the key. Since you will be using it on a web server, you need to click on Server key to continue.
Finally, you need to provide a name for the key. This could be anything that you can later identify easily. You can leave the IP addresses field blank.
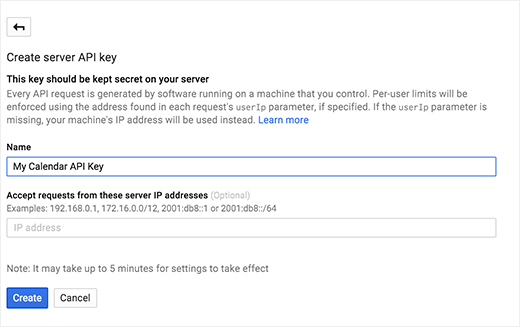
You have successfully created an API key to use with your Google Calendar. Now you can copy the API key and paste it into the plugin’s settings page.
Don’t forget to click on the save changes button to store your settings.
Making Your Google Calendar Public
If you want to share a Google Calendar, then you need to change calendar settings and make it public. Here is a step by step guide on how to make your Google Calendar public.
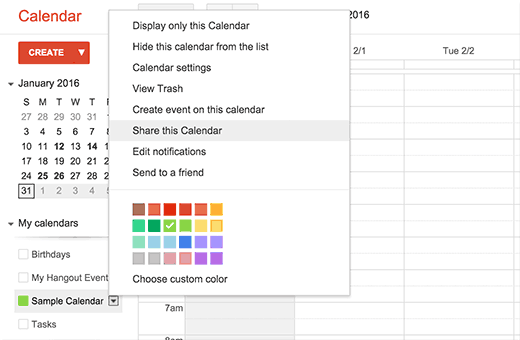
Simply go to Google Calendars and click on the drop-down icon next to the calendar you want to share.
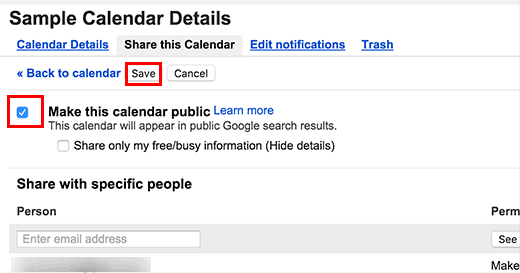
This will take you to calendar sharing settings. You need to check the box next to make your calendar public and then click on the save button.
The last thing you need is to get the unique calendar ID. You will need this ID to display the Calendar in WordPress. Simply click on the Calendar details tab.
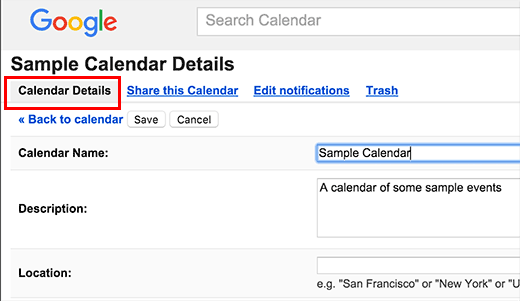
Scroll down to the calendar address section page. There you will find your calendar ID. You need to copy this ID and paste it in a text file. You will need this calendar ID in the next step.

Adding a New Calendar in WordPress
You have successfully connected your WordPress site with your Google Calendars. The next step is to add Google Calendar in WordPress.
Simply go to Calendars » Add New page. You will see a screen much like the post or page editing screens in WordPress.
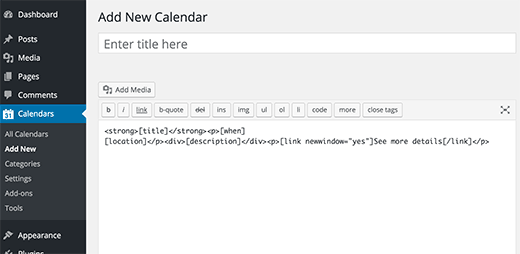
Start by entering a title for your calendar. You will notice that the plugin has already added some shortcodes and text in the textarea. You can leave that as it is and scroll down to the calendar settings box below the text editor.
You need to click on the Google Calendar tab in the calendar settings box and paste your Calendar ID.
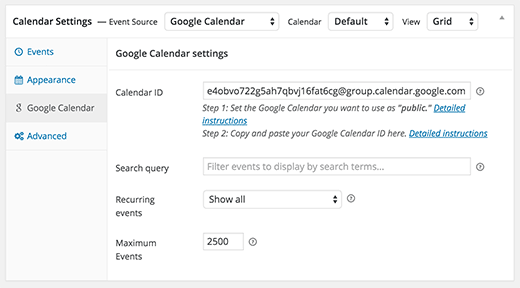
You can also click on other tabs in the calendar settings box to customize how the calendar will display on your WordPress site.
When you are done, simply click on the publish button to save your calendar.
Display Google Calendar on Your WordPress Site
The Google Calendar you just created is not visible on your WordPress site yet. You will still need to add the calendar to a WordPress post or page.
Simply create or edit a WordPress post or page. On the post editor screen, you will notice the new ‘Add Calendar’ button.
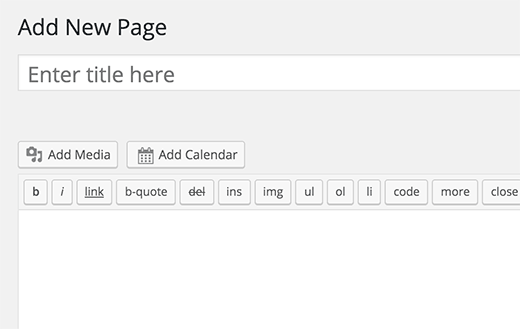
This will bring up a popup where you can select the calendar you just added from a drop-down menu.
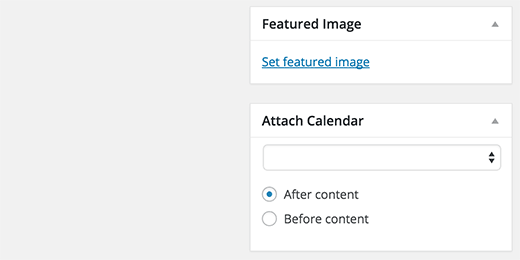
You can also attach a calendar to a post by selecting it from the attach calendar meta box on the post edit screen.
If you want to display your Google calendar in a sidebar widget, then Simple Calendar plugin has a widget for that.
You will need to visit the Appearance » Widgets page and find the Simple Calendar widget in the list of available widgets. Next, simply drag and drop the widget to a sidebar.
In widget settings, you will need to select your calendar from the drop-down menu. Don’t forget to click on the save button to store your widget settings.

That’s all, you can now visit your website to see your Google Calendar in action. You will notice that the plugin will beautifully highlight your events on the calendar. If you take the mouse over to an event, it will display event details.

We hope this article helped you learn how to add Google Calendar in WordPress.
