Do you want to add a slide out the contact form in WordPress? If your business depends on getting new leads from your website’s contact form, then one of the best ways to grow your lead source is to make your contact form more noticeable. In this article, we will show you how to add a slide out the contact form in WordPress without annoying your users.
Why Add a Slide Out Contact Form in WordPress?
Many small business owners start their website hoping that it will help them grow their business.
That’s why you add a contact form page, so users can get in touch with you.
However, the problem is that most users who may have questions will leave your website without contacting you.
That’s why you might notice that many popular websites add contact form popups, slide in contact forms, or call to action buttons that open contact forms.
These animated and interactive options divert the user’s attention to the contact form and allow them to quickly fill the form without visiting another page. These forms significantly boost your conversions that’s why you are seeing them everywhere.
Let’s take a look at how to create a slide out the contact form in WordPress.
Adding a Slide Out Contact Form in WordPress
For this tutorial, you will need WPForms. It is the best WordPress contact form plugin in the market.
You can use the free version of WPForms contact form plugin if you don’t need all the premium features.
You’ll also need OptinMonster. It is the most powerful conversion optimization software. It helps you convert abandoning website visitors into customers. You’ll need their pro plan which gives you access to the canvas feature that we will be using in this tutorial.
Step 1. Creating a Contact Form in WordPress
First, you need to install and activate the WPForms plugin.
Upon activation, you need to visit WPForms » Add New page to create your contact form. This will launch the WPForms builder interface.
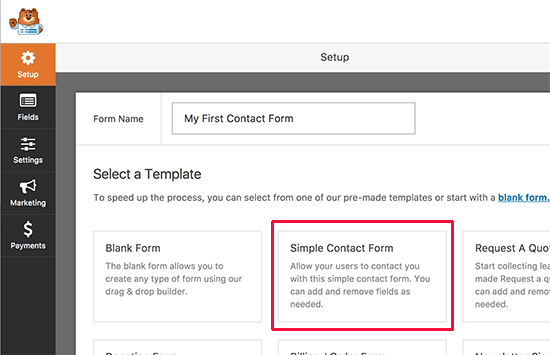
Enter a name for your contact form and then select the ‘Select contact form’ template.
WPForms will load a simple contact form. You will see the form preview in the right pane. You can click on any field to edit it or add new fields from the left column.
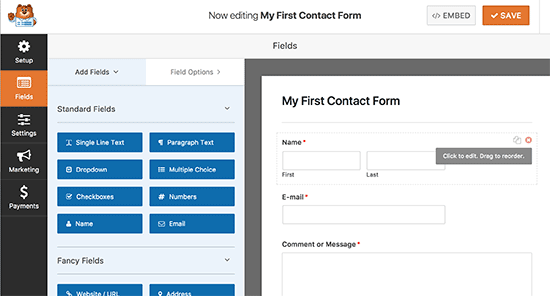
Once you are finished editing the form, click on the save button to save your changes.
Next, you need to click on the embed button on top to get your form’s embed code.
This will bring up a popup showing your form’s shortcode. Go ahead and copy this shortcode because you will need it in the next step.
Step2. Creating a Slide Out Optin in OptinMonster
Now we will create a slide out campaign which will display the contact form you created in the first step.
First, you need to install and activate the OptinMonster plugin.
This plugin acts as a connector between your website and your OptinMonster account.
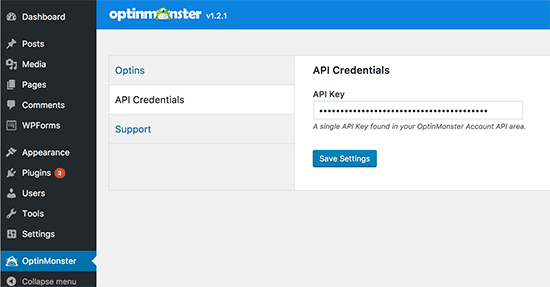
Upon activation, click on the OptinMonster menu in your WordPress admin bar and enter your API key. You can get this information from your account on the OptinMonster website.
After entering your license key, click on the ‘Create new optin’ button on the top right corner of your screen.
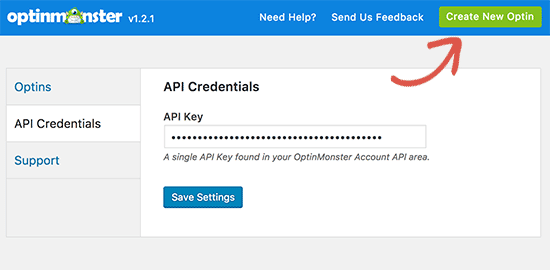
This will take you to the OptinMonster website.
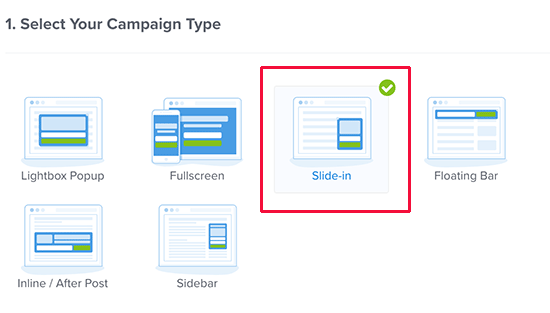
OptinMonster offers different types of dynamic campaigns. For this tutorial, we will be using the ‘Slide in’ campaign. Go ahead and click to select ‘Slide in’ as your campaign type.
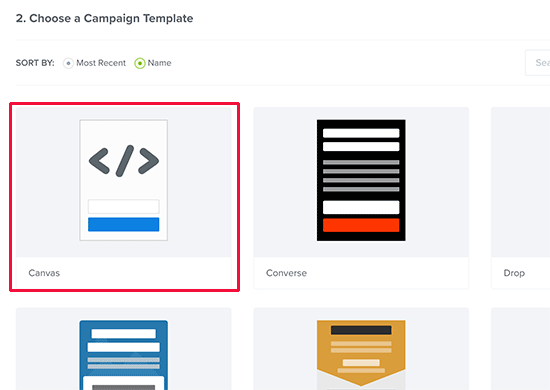
Next, you need to select the template. OptinMonster offers several ready-made templates, but we need to select ‘Canvas’ for this tutorial.
As soon as you select the template, you’ll be asked to provide a name for your campaign. This will help you easily locate the campaign in your OptinMonster dashboard.
Now OptinMonster will load its campaign builder interface.
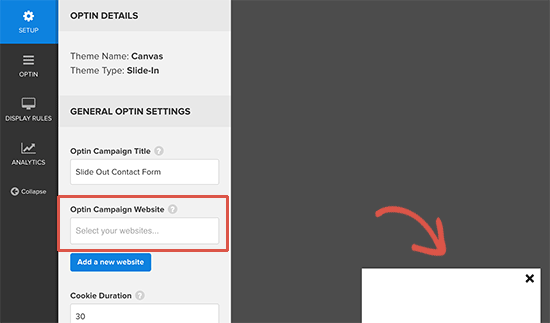
You’ll see a live preview of your campaign on the right. Since we are using the canvas template, it will be totally blank at the moment.
On the left hand, you’ll notice different tabs. Under the ‘General Optin Settings’ section, you need to enter your website’s URL below the ‘Optin campaign website’ option.
Next, you need to switch to the ‘Optin’ tab. Here you can select colors, height, and width for your option.
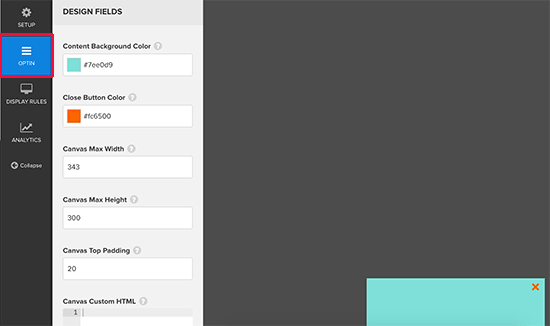
Go ahead and select the colors you like and adjust the width and height so that it can nicely show your entire form.
After that, you need to scroll down to the ‘Canvas custom HTML’ section and enter the WPForms shortcode you copied earlier.
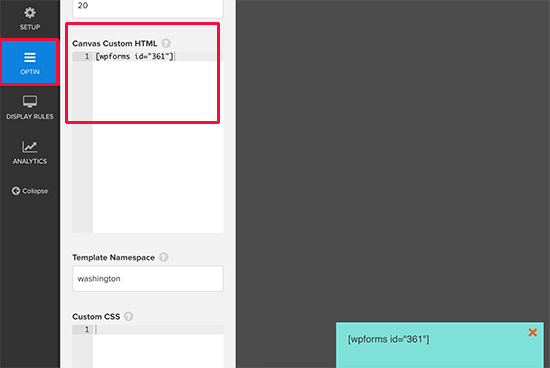
Entering the shortcode will not show your form inside the slide-in campaign right away. That’s because the shortcode only works on your own WordPress site.
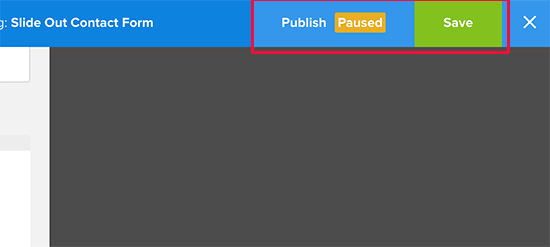
You can now click on the ‘Save’ button at the top to store your settings and then click on the ‘Publish’ button.
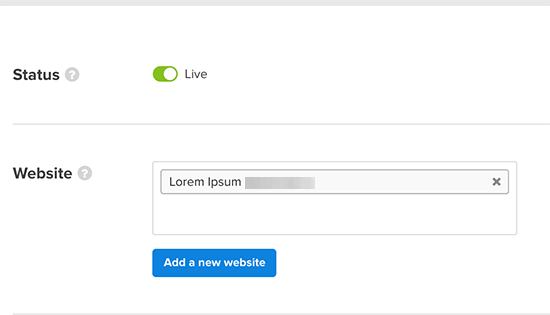
On the next screen, you need to change the option status to published. This will make the option available to your WordPress site.
Step 3. Showing Slide Out Contact Form in WordPress
Now that you have created both the contact form and slide out campaign, you are ready to display it on your website.
Go ahead and visit the OptinMonster page in your WordPress admin area. You will see your recently created slide out campaign listed there.
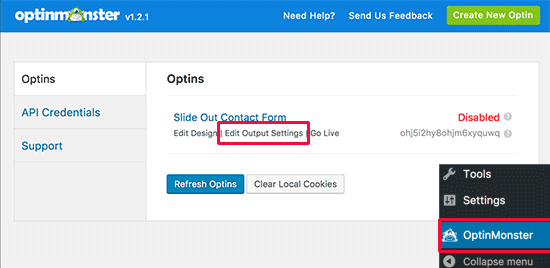
You need to click on the ‘Edit output settings’ link to decide how you would want to display on your website.
On the next screen, make sure that you check the box next to ‘Enable option on site?’ option. OptinMonster allows you to choose who can see the option. You can also select the specific area of your website to display the option.
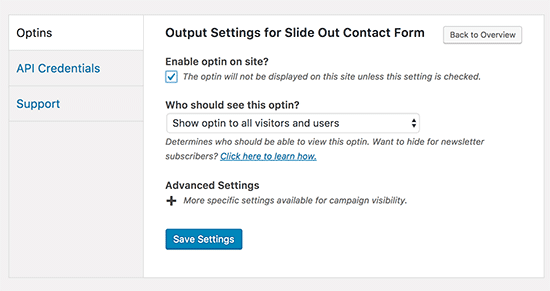
Don’t forget to click on the save settings button to store your changes.
You can now visit your website to see the slide out the contact form in action. Make sure that you use incognito mode in your browser or log out of WordPress, so you can see exactly what your users will see.

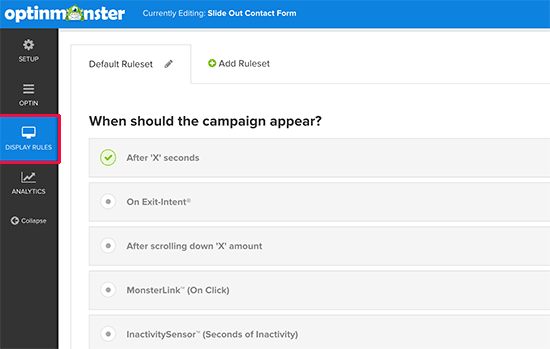
By default, the slide out campaign will appear 5 seconds after the page is completely loaded. However, OptinMonster allows you to change that as well.
You can create countless rules to display the campaign whenever certain conditions are matched.
For example, you can show the slide out the form when a user has scrolled 50% of the page when a user is about to leave a page and many more.
We hope this article helped you learn how to add the slide out the contact form in WordPress.

