Have you ever wondered how designers are able to use beautiful custom web fonts on their sites? Often they’re adding custom fonts to WordPress using Typekit, an Adobe service that gives you access to high-quality fonts. In this article, we’ll show you how to add Typekit fonts in WordPress to improve your typography.
Why Use Typekit Fonts?
Typekit is a popular subscription-based font service that can save you a lot of money. Instead of paying for individual font licenses, which can get quite expensive, you can access their whole library of hundreds of fonts for free or for a flat yearly rate.
The Typekit library is a massive collection of over 1,000 fonts. Some of the most beautiful fonts that you can find on the web are available through Typekit, an Adobe service.
Their basic free plan comes with access to 230+ fonts, and you can use 2 font families on one website for free. Other plans start from $49.99 to $99.99 per year.
These awesome Typekit fonts can be easily added to any website without slowing down your page load speeds. The fonts are served from Adobe’s CDN and load at much faster speeds than if you were to host them on your own site.
Why Use Custom Web Fonts on WordPress?
Typography plays a crucial role in the design of your site.
Choosing the right fonts will clearly communicate your personality and message to your readers. No matter what kind of image you want to portray — professional, friendly, casual, experienced — the fonts on your website can help project the right image.
By using the right set of fonts, you can leave a lasting impression. Instead of looking like every other site on the web, your text looks noticeably different. Selecting the proper font for your WordPress site can make your website go from a simple design to an aesthetically pleasing and stunning work of art.
The right custom web fonts can:
- increase conversion rates
- lower your site’s bounce rate
- increase time spent on your website
- create a memorable experience for users
Ready to get started with Typekit fonts? Here’s how to use Typekit to customize your WordPress design.
How to Get Started With Typekit
First, you’ll need to create a Typekit account. To do this, just visit Typekit.com to compare the available plans.
You’ll need to choose which plan you want to sign up for. The free plan limits you to one website and includes access to limited fonts. You may want to get started with the free plan to try it out and then upgrade later on. The upgrade gives you a larger library of fonts, and you can use them on more websites.

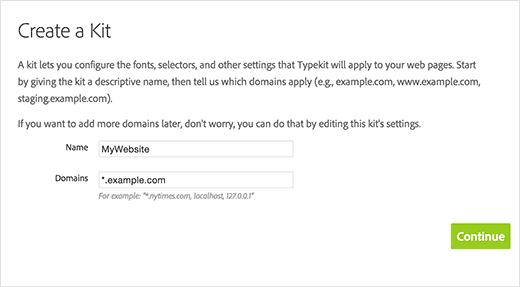
The next step is creating a kit. The kit lets you put together a specific library of fonts and settings for your website, so Typekit loads only the files and code needed. To create your kit, add your site name and domain name and then click on Continue.
After you’re done filling out your information for your kit, Typekit will give you a bit of JavaScript code to add to your site. You can copy and paste this code in a text editor like Notepad to save it for now. We’ll add it to your site in the next step of this tutorial.
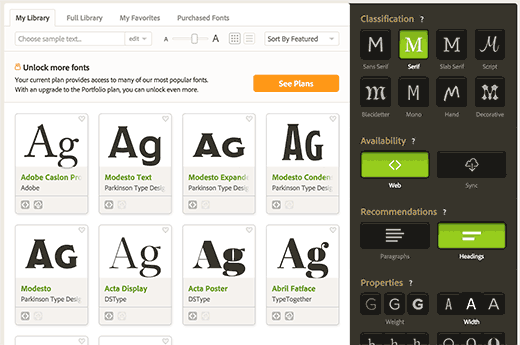
For now, you can get started choosing your fonts. You can browse the font library and filter by options like classification, weight, width, x-height, and more.
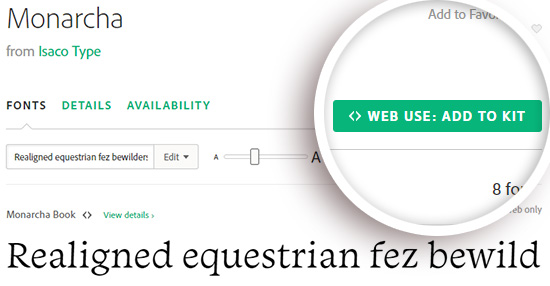
When you see a font you like, you can click on it for more details and examples. If you’d like to add it to your web kit, click the Web Use: Add to the Kit button on the right side.
This will bring up a pop-up where you need to add the font you selected to the kit you just created.
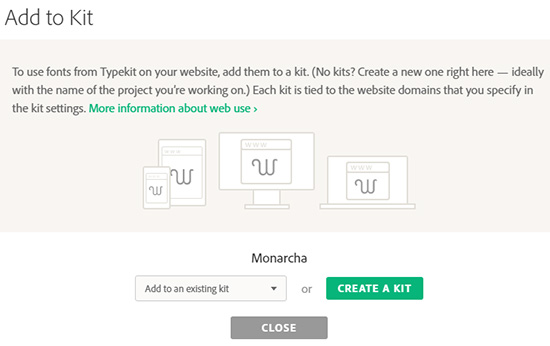
Now you can click the Publish button to save the changes to your kit.
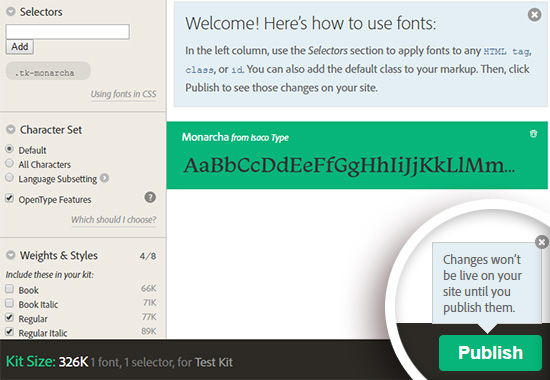
That’s all! Your font kit is now ready to use.
Adding Your Typekit Fonts in WordPress
The easiest way to add your new custom web fonts to your WordPress blog is by using a WordPress Typekit plugin.
We recommend the Typekit Fonts for WordPress plugin. After installing and activating the plugin, you can visit Settings » Typekit Fonts to configure the plugin.
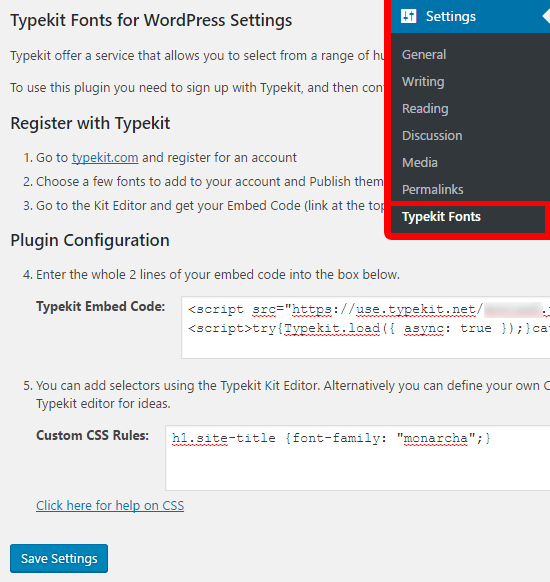
First, you’ll need to paste the JavaScript code you saved earlier in the Typekit embed code field. After that, you can add CSS selectors to specify where you want to use the font on your site.
In the screenshot above we added the font to the h1.site-title CSS selector.
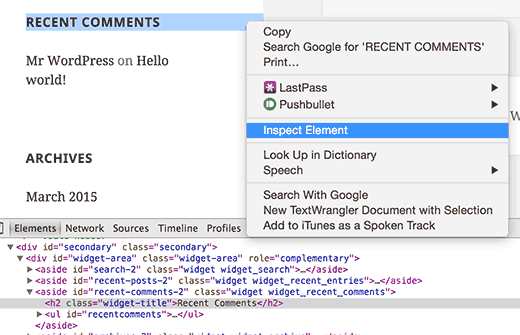
Your WordPress theme may use different classes for different elements. You’ll need to use the Inspect Element tool in your web browser to find out those CSS classes.
That’s all! We hope this article helped you learn how to add awesome typography in WordPress with Typekit.
