Do you want to add one-click login with Google to your WordPress site? Allowing users to login with their Gmail account saves them time because they wouldn’t have to remember their WordPress username and password. In this article, we will share how to easily add one-click Google login in WordPress.
Why Should You Add One-Click Google Login in WordPress?
Most internet users remain logged in to their Google accounts. This allows them to quickly access all Google apps like Gmail, Drive, Docs, Photos, and more without signing in separately for each app.
Having one-click Google login activated on your WordPress login page allows your users to quickly sign-in to your website using their Gmail account. It saves them time, and they wouldn’t have to enter their login credentials each time.
If your organization uses GSuite for professional business email addresses, then your team members can use your organization’s Google apps accounts for login.
If you run a simple WordPress blog, then you might not find this feature useful. However single sign-on feature like one-click Google login is very helpful for any websites that require users to logins such as multi-author websites, membership websites, and websites selling online courses.
That being said, let’s take a look on how to easily add one-click login with Google to your WordPress website.
Adding One-Click Gmail Login in WordPress
First thing you need to do is install and activate the Google Apps Login plugin. For more details, see our step by step guide on how to install a WordPress plugin.
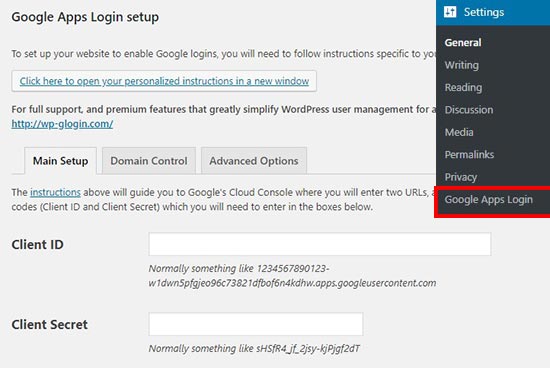
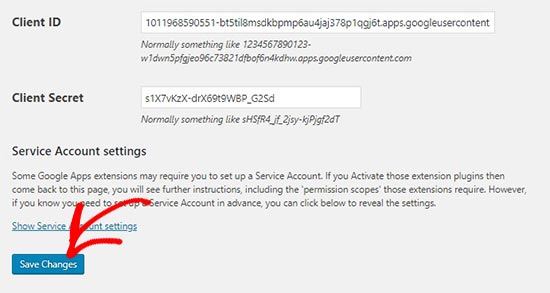
Upon activation, you need to go to Settings » Google Apps Login page in your WordPress admin area. Under the Main Setup tab, you’ll need to add Client ID and Client Secret code.
To get these details, you need to visit the Google Developers Console. If you are not already logged in, then you will be asked to login with your Google account.
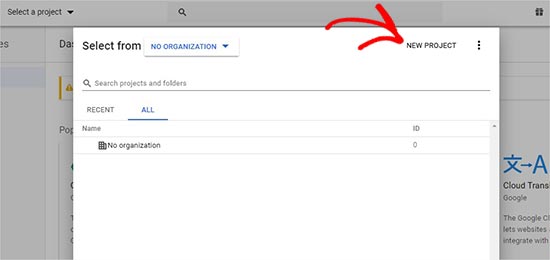
Next, you need to click on Start a project from the top menu. It will open a popup where you would click on New Project button to continue.
Now, you need to add a project name and select the location. Project name can be anything, and Location will be your organization’s domain name (example.com). If you are logged in with your company’s Google account or your GSuite account, then it will add the location and organization automatically.
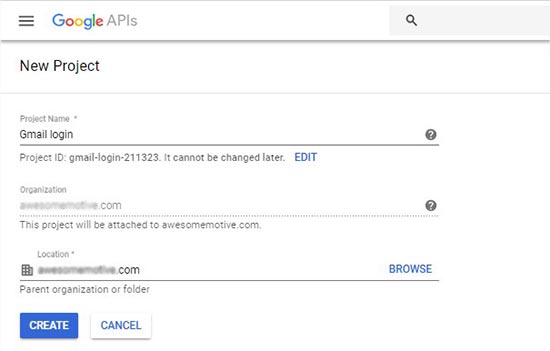
However, if you are creating a project from your personal Google account, then you can leave the location with No Organization selected.
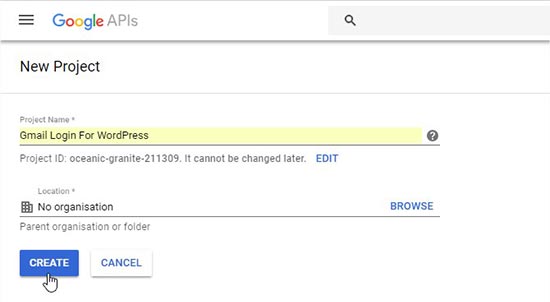
Next, click on the Create button to continue.
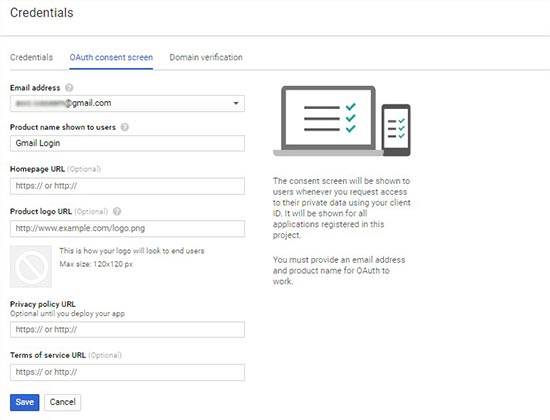
You’ll now be redirected to APIs & Services dashboard. On this page, you need to click on Credentials from the left menu and go to OAuth consent screen page.
In the Email Address field, you need to add the email address that you have used to create this project. Also, you need to add your website URL in the Homepage URL field and click on the Save button.
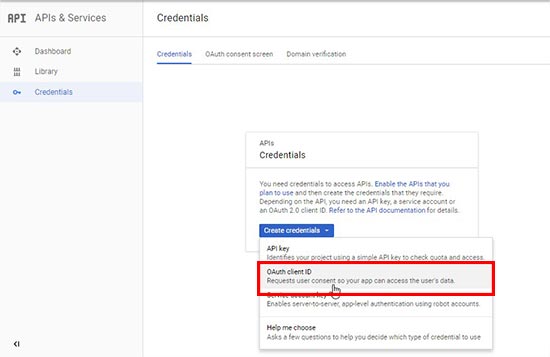
After that, it will take you to the Credentials page again. Go ahead and click on the Create Credentials button to select OAuth client ID option.
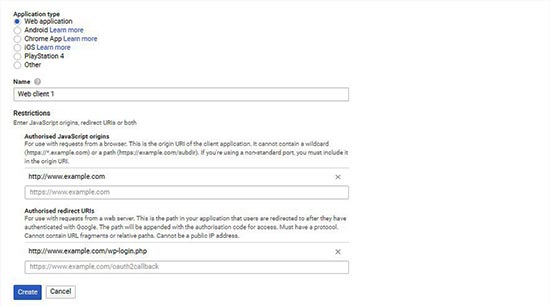
Next, you need to select Web application as an Application type. In the Authorised JavaScript origins field, you need to enter your website URL (http://www.example.com), and add WordPress login page URL (http://www.example.com/wp-login.php) in the Authorised redirect URLs field.
After that click on the Create button, and you’ll see your Client ID and Client Secret information in a popup.
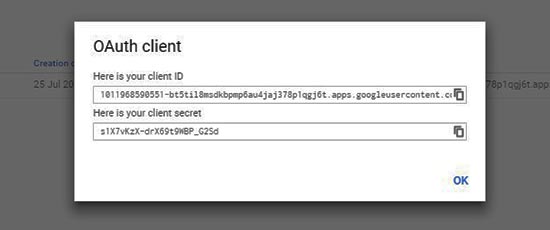
You need to copy and paste these keys on the plugin’s settings page in your WordPress admin area.
After that, you can simply logout from your WordPress admin account, and you’ll see a Login with Google button on your login screen.
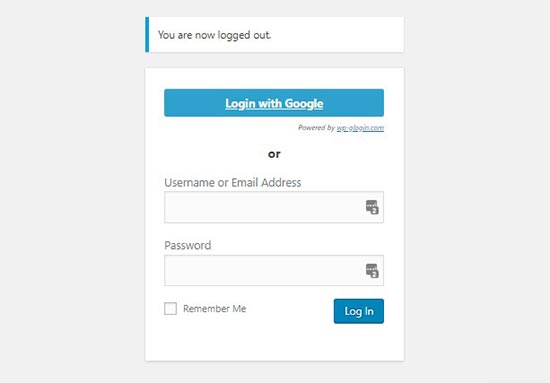
Clicking on the button allows you to login with one-click into your WordPress account. However, keep in mind that users can only login with the Google account address that they have used on your website.
We hope this article helped you learn how to add one-click login with Google in WordPress.
