Do you want to add taxonomy images in WordPress? Taxonomies are a way to group things in WordPress. Categories and tags are two default taxonomies that come built-in with every WordPress blog. In this article, we will show you how to add taxonomy images in WordPress. In other words, you will be able to add image icons for your categories, tags, and other custom taxonomies.
Why Add Taxonomy Images in WordPress?
Custom post types and taxonomies allow WordPress to become a full-fledged CMS. By default, WordPress comes with category and tags as two default taxonomies that you can use to sort your posts.
You can also create your own custom taxonomies and associate them with any post types on your WordPress site. This allows your users to see all other content filed under those taxonomies.
With taxonomy images, you can add featured images or icons to the terms in each taxonomy.
For example, each category on your site can have its own icon, which can be displayed on category archive pages, category lists, and so on.
Having said that, let’s take a look at how to easily add taxonomy images in WordPress.
Adding Taxonomy Images in WordPress
The first thing you need to do is install and activate the Taxonomy Images plugin.
Upon activation, you need to visit the Settings » Taxonomy Images page to configure plugin settings.
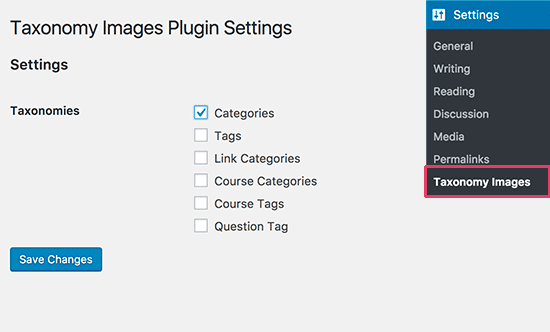
You will see a list of taxonomies available on your WordPress site. Select the taxonomies where you want to enable the taxonomy images to feature and then click on the save changes button.
In the screenshot above, we enabled taxonomy images for categories.
To add images to each category, you will need to head over to Posts » Categories page.
If you enabled taxonomy images to feature for some other taxonomy, then you will need to visit that particular taxonomy page in your WordPress admin area.
On the categories page, you will notice a new column labeled ‘Image’ in your category list. Since you haven’t added any images to categories yet, it will show a default blank image with an add button for each category.
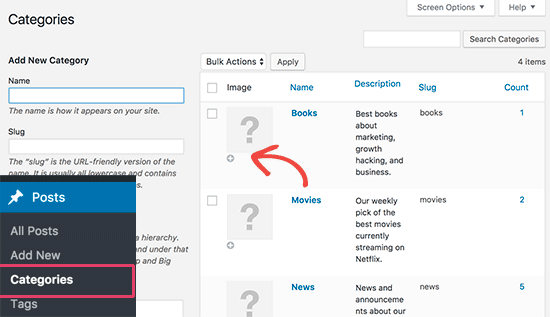
Go ahead and click on the add button below the blank image. This will bring up the default WordPress media uploader popup.
You can select an image from your WordPress media library or upload a new image. After that, go ahead and repeat the process to add images for all terms in your taxonomy.
You can remove an image at any time you want by simply clicking on the remove button below the image.
Displaying Taxonomy Images on Your WordPress Site
To display taxonomy images on your WordPress site, you will need to edit your WordPress theme or child theme.
First, you will need to connect to your WordPress site using an FTP client.
Once connected, you will need to find the template responsible for displaying your taxonomy archives. This could be archives.php, category.php, tag.php, or taxonomy.php files.
You need to download the file to your computer and open it in a text editor like Notepad or TextEdit.
Now paste the following code where you want to display your taxonomy image. Usually, you would want to add it before the taxonomy title or tagthe_archive_title().
|
1
|
print apply_filters( 'taxonomy-images-queried-term-image', '' ); |
After adding the code, you need to save this file and upload it back to your website using FTP.
You can now visit the taxonomy archive page to see it display your taxonomy image. Here is how it looked on our demo archive page.

You can use custom CSS to style this image.
Advanced users can look for more code examples on the plugin’s homepage.
We hope this article helped you learn how to easily add taxonomy images in WordPress.
