Do you want to add watermark to your images in WordPress? Many photographers and artists use the watermark to prevent misuse of their images. In this article, we will show you how to automatically add watermark to images in WordPress.
Method 1: Adding Watermark to Images in WordPress Using Envira Gallery
Envira Gallery is the best WordPress gallery plugin in the market. It allows you to create beautiful and mobile friendly image galleries into your WordPress site.
Envira comes with a watermarking addon that makes it easy to add watermark to your WordPress images.
The first thing you need to do is install and activate the Envira Gallery plugin.
Upon activation, you need to visit Envira Gallery » Settings page to enter your license key.
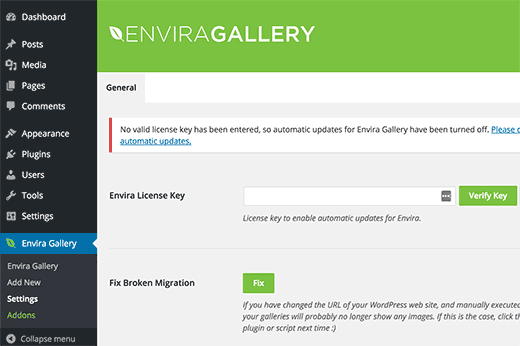
You can get this key from your account dashboard on the Envira Gallery website.
After verifying your license key, you can head over to Envira Gallery » Add-ons page. Scroll down or search to locate the Watermarking Addon, and then install and activate it.
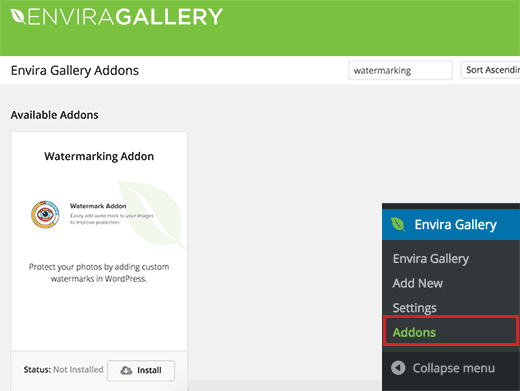
You are now ready to add your images into responsive galleries with the watermark. Simply go to Envira Gallery » Add New to create your first image gallery.
Scroll down on the page and you will notice the watermarking tab. Clicking on it will show you settings for watermarking.
You need to click on the checkbox next to ‘Enabled’ to see more options.
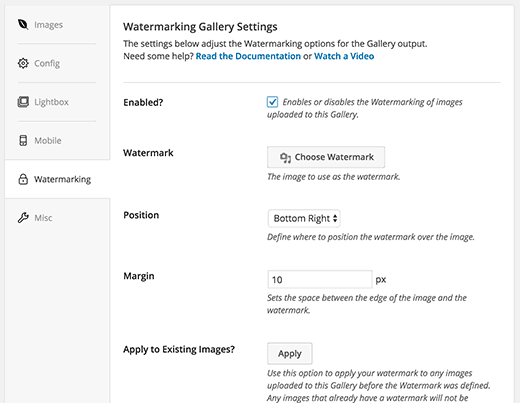
After that click on ‘Choose Watermark’ button and upload an image that you want to use as the watermark. You can also change the position and margin of the watermark image.
After adding a watermark image, you can now move on to adding images into this gallery. Scroll up, and then click on ‘Select files from computer’ or ‘Select files from other sources’ button.

After adding a few images to your gallery, you can publish it.
Now you can add this image gallery into any WordPress post or page. Simply edit a post or page and then click on the ‘Add Gallery’ button.

Clicking on the button will bring up a popup where you need to select the image gallery you just created and then click on the insert button.
You will notice the Envira Gallery shortcode appear in the post editor. You can now save or publish your post/page.
Go ahead and visit your website to see the watermarked image gallery in action.

Method 2: Adding Watermark to Images in WordPress Using Easy Watermark
The first thing you need to do is install and activate the Easy Watermark plugin.
Upon activation, you need to go to Settings » Easy Watermark page to configure plugin settings.
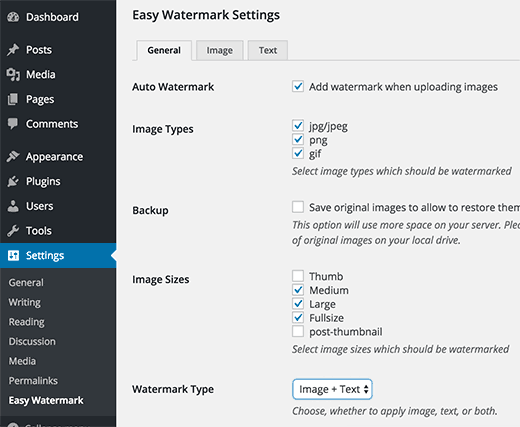
The settings page is divided into three tabs. The first option on the General settings tab is to automatically add watermark to all image uploads. You can also choose which image file types to auto watermark.
Next option is back up, you should check this if you want to save original uploads on your server too. You can also select which image sizes to add watermark to.
You also need to select watermark type. The plugin allows you to add text, image, or both to be used as the watermark.
Review rest of the options on the page, and then click on save changes button to store your settings.
Now you can click on the Image tab on the plugin’s settings page. This is where you can upload the image you want to be used as the watermark.
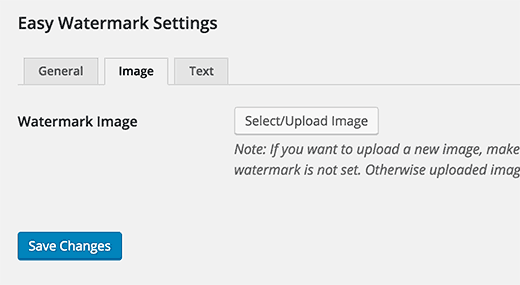
If you selected image+text or just the text as your watermark type, then you need to click on the text tab.
Here you can add the text you want to be displayed as the watermark. You can select the font, font size, watermark alignment, transparency, and color.
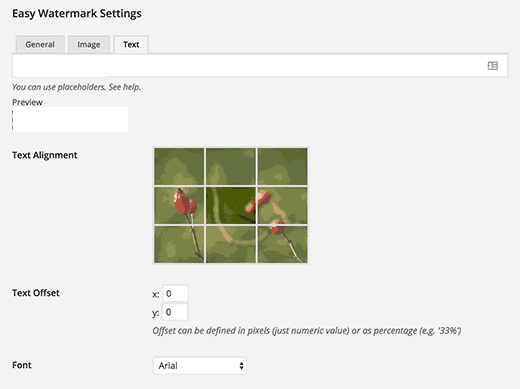
Don’t forget to click on the save changes button to store your settings.
You can now add watermark to images you add to your WordPress site.
Adding Watermark to Your Old Images in WordPress
To add watermark on the old images, you need to go to Media » Easy Watermark click on start button under Bulk Watermark section.

Important: Please note that this process is irreversible. We strongly urge you to back up your WordPress site particularly your media uploads directory.
If you selected the option to keep a backup of your original uploads, then you can also use the restore option on this page, which will remove watermark from all images that have them.
Adding Watermark to Images Manually
In case you don’t want to automatically add watermark to all uploaded images, Easy Watermark gives you the manual option as well.
The first thing you need to do is to go to Settings » Easy Watermark and make sure that the checkbox next to Automatically add watermark to images is unchecked.
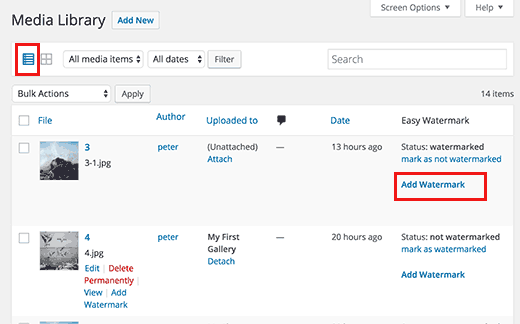
After that, you can go to Media » Library. You will need to switch to the list view to see the Add Watermark option next to each image in the library.
We hope this article helped you add you add watermark to images in WordPress.

