Do you want to build an auction site like eBay using WordPress? An auction website allows users to bid on products to purchase them. This allows you to maximize profits while selling unique products. In this article, we will show you how to easily build an auction site like eBay using WordPress without any technical skills.
What Do You Need to Build an Auction Site Using WordPress?
You will need the following things to make your own auction site like eBay using WordPress.
- A domain name (This will be your website’s name that people will type to find your site e.g. wpbeginner.com)
- A web hosting account (This is where your website’s files are stored)
- SSL Certificate (You need this to receive online payments)
- An e-commerce add-on (This will turn your website into an eCommerce platform)
- An auctions addon (This will add auction features to your website)
- Your undivided attention for 40 mins
Yes, you can start your own auction site in 40 minutes, and we will walk you through the whole process, step by step.
In this tutorial, we will cover the following:
- How to get a domain name for free
- How to choose the best website hosting
- Install WordPress and set up your e-commerce addon
- Install and set up auctions addon
- Add and manage auctions
- Resources to learn WordPress and grow your business
That being said, let’s get started.
Step 1. The Right Setup
First, you need to make sure that you are using the right website platform, and since you’re on this article, you won’t be making the mistake that others do.
There are two types of WordPress software, so it’s easy for beginners to get confused. First, there is WordPress.com which is a hosting platform, and then you have WordPress.org also known as self-hosted WordPress.
We recommend using self-hosted WordPress.org because it gives you access to all WordPress features out of the box. For comparison, see the difference between WordPress.com vs WordPress.org.
First, you will need a domain name and a web hosting account. But you cannot sign up with just any web hosting company. You will need a hosting provider that specializes in WooCommerce hosting because this is the software you’ll be using as your e-commerce platform.
Usually, a domain name costs $14.99/year, web hosting 7.99/month, and SSL certificate 69.99/year.
Now, this is a lot of money if you are just starting out.
Fortunately, Bluehost, an officially recommended WordPress and WooCommerce hosting provider has agreed to offer our users a free domain + free SSL and discount on their cloud WordPress hosting.
Basically, you can get started for $6.95 / month.
Once you have purchased the hosting, then follow our step by step tutorial on how to start an online store for complete setup instructions.
You would now have a WordPress website with WooCommerce installed on it. By default, WooCommerce doesn’t allow you to add products for auction on your website.
Let’s change this by installing an auctions addon for WooCommerce.
Step 2. Turn Your E-commerce Store into an Auctions Site
First, you need to install and activate the YITH WooCommerce Auctions plugin. For more details, see our step by step guide on how to install a WordPress plugin.
YITH WooCommerce Auctions is a paid plugin and a single site license will cost you 81 Euros. This gives you access to the plugin downloads, documentation, and 1 year of support and updates.
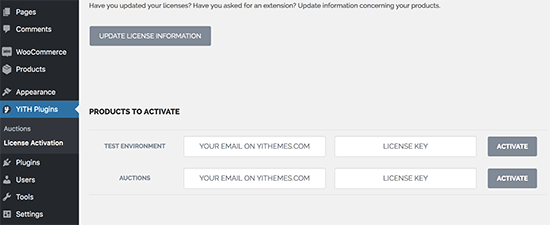
Upon activation, you need to visit YITH Plugins » License Activation page to enter your license key. You can find this information under your account on the plugin’s website.
Next, you need to head over to the YITH Plugins » Auctions page to configure plugin settings.
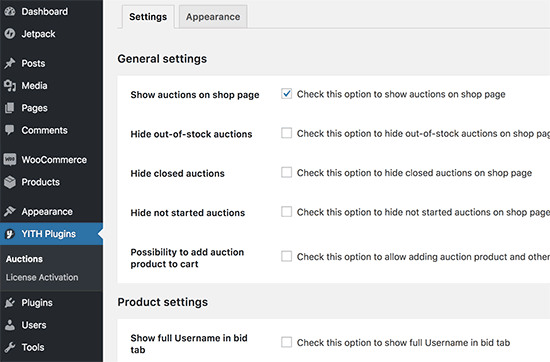
The default settings would work for most websites, but you can still review and adjust them as needed.
Step 3. Adding an Auction Item
YITH WooCommerce Auctions makes it super easy for you to add an item for auction using the built-in WooCommerce products.
Simply add your auction item as a new WooCommerce product by visiting Products » Add New page.
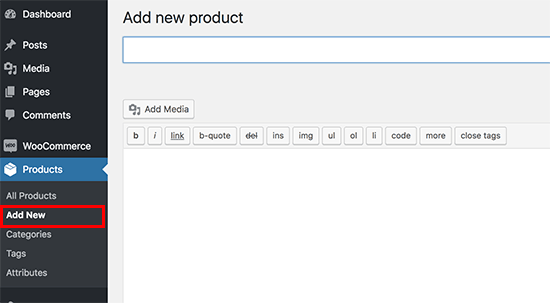
On this page, you need to enter your auction item details like you would add a product. After that fill out the title, add details, and upload pictures.
Below the editor, you need to select ‘Auction’ next to Product Data option, and you will see settings for the auction item.
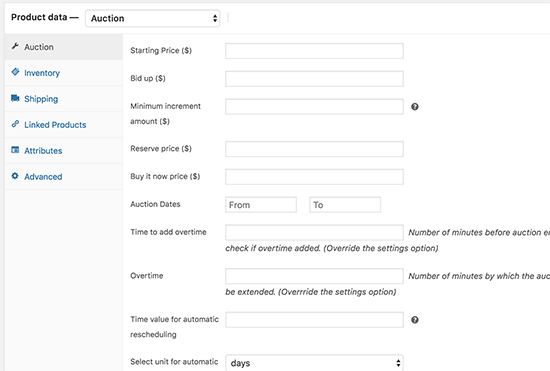
From here you can set an auction starting price, bid up, minimum increment amount, reserve price, and buy now price.
After that, you need to select the auction dates and time. You can also add an overtime for the auction to offer a grace period after the auction ends.
Once you are satisfied with the settings, click on the publish button to save your changes.
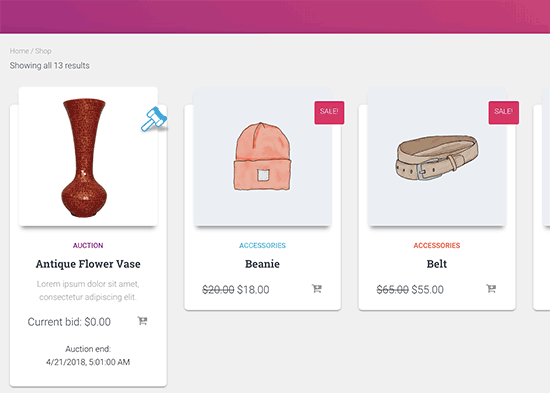
Your auction will now appear on your WooCommerce shop page. Auction items on the shop page will be highlighted with an icon.
You can use the auction plugin to add auction items along with other fixed-price WooCommerce products.
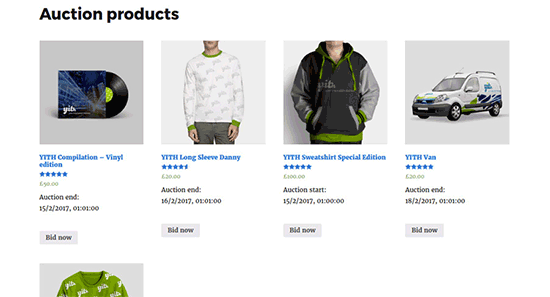
You can also create a separate page to only list the products available for auction. Simply create a new WordPress page and add the following shortcode.
[yith_auction_products]Don’t forget to publish the page to make it live on your website.
Step 4. Managing Your Auctions
You can add auction items at any time, and they will start appearing on your website right away. However, the auction will not begin until the auction start time.
This allows you to publish items way before the auction begins and use this time to promote items. Once the auction begins, any registered users can bid on an item.
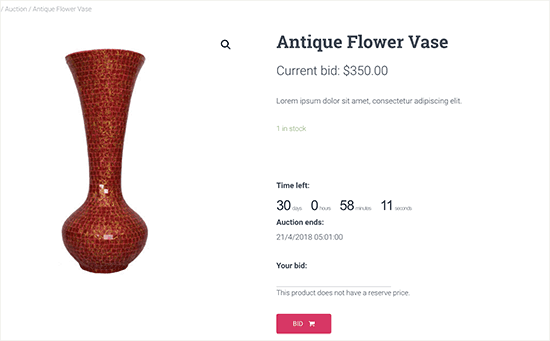
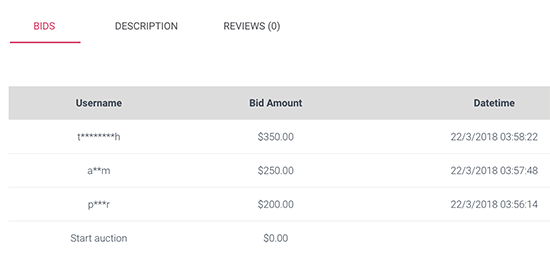
The plugin will show an auction timer next to the item. Users can see the current highest bid and add their own bids.
Previous bids will be displayed below with usernames partially encrypted.
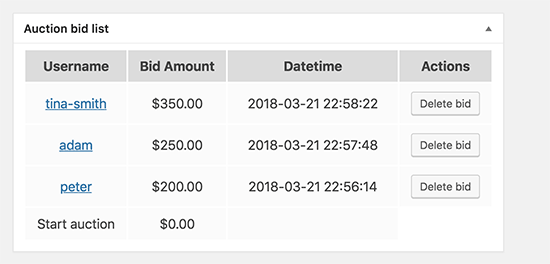
You have the option to remove a bid at any time. Simply edit the auction product, and you will see all the bids at the bottom of the product page.
The auction will end depending on each item’s individual auction settings.
If the auction time ends, then the highest bidder’s price will be accepted. If a user decides to offer the buy now price, then the auction will end, and they will be able to add the product to their cart.
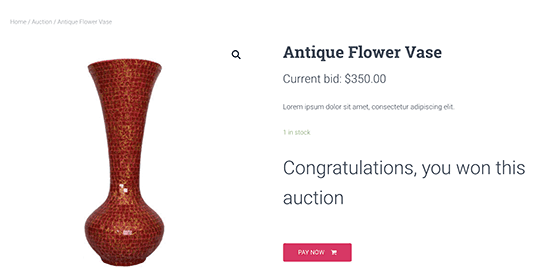
All users who participated in the auction will receive email notifications for each new bid, auction grace time, auction end, etc. The final email will be sent to the auction winner, informing them that they can now make their payment.
Step 5. Allowing Other Users to Add Auction Items
If you want to allow other users to add their own products for auction, then you can do that as well. However, YITH WooCommerce Auctions plugin doesn’t allow users to add their own auction items.
By default, WooCommerce assumes that you are the only seller on your website and only you can add new products. To change this you need to make your WooCommerce platform a multi-vendor marketplace.
For detailed step by step instructions, see our guide on how to create an online marketplace using WordPress.
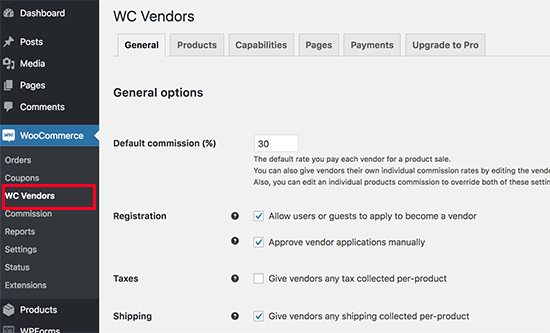
Once you set up your website as an online marketplace, other users will be able to apply and become a seller on your website. After you approve their application, they will be able to add new products for auction. You can then approve their auctions and it will become live on your site.
Once the auction is over and the winning bidder has made their payment, you will get your commission out of the winning bid.
Step 6. Mastering WordPress to Promote Your Auction Site
WordPress is the best website builder in the world. It is very easy to learn and you can customize any feature you want.
Here are some useful resources that will help you take your auctions site to the next level.
- Best WooCommerce themes
- Best WooCommerce plugins
- Must have WordPress plugins for business websites
- The ultimate guide to improving WordPress speed and performance
We hope this article helped you build your own auction site like eBay using WordPress. You may also want to see our ultimate step by step WordPress SEO guide for beginners.
