Do you want to bulk upload WordPress media files using FTP? By default, WordPress does not allow you to upload media files via FTP which can be annoying for users who want to bulk upload files at once. In this article, we will show you how to easily bulk upload WordPress media files using FTP.
Why Bulk Upload WordPress Media Files Using FTP
The default WordPress media uploader allows you to upload multiple files at once. You can do so by clicking on the ‘Add Media’ button while writing posts or by visiting Media » Add New page.
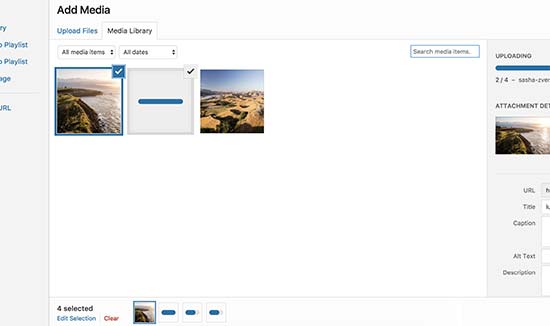
You can select multiple photos, images, audio, and even video files to upload and WordPress will do the rest.
However, this method may not work sometimes. You may see a maximum file upload size limit issues or the files may take forever to upload.
An easier alternative is to upload the files using FTP. However, WordPress doesn’t recognize files uploaded via FTP, and it will not show them inside the admin area.
Luckily, there’s a way around that. Let’s take a look at how to easily bulk upload WordPress media files using FTP, and how to make them available inside WordPress.
Bulk Uploading Media Files in WordPress via FTP
First, you need to connect to your WordPress site using an FTP client. If you haven’t done this before, then see our guide on how to upload files to your WordPress site via FTP.
Once you are connected to your website via FTP, go to /wp-content/uploads/ folder.
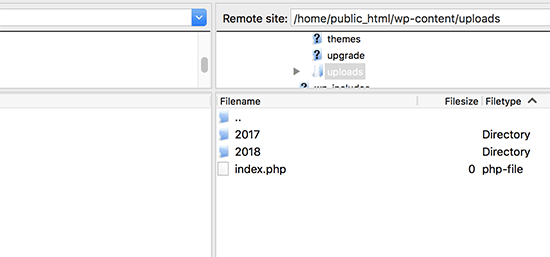
Inside the uploads folder, you will see folders for years and months. That’s how WordPress stores media files by default. You can upload your media files to the current year and current month folder.
If it doesn’t exist, then you can create it. For example, 2018 for the current year and inside that folder you can create a new folder 01 for the month of January.
Uploading your files may take a while depending on file size and your internet speed.
Once you have uploaded all your images, audio, video, or any other media files supported by WordPress, you are ready to import them into WordPress.
Making Your FTP Media Uploads Visible in WordPress
Even though you have uploaded the files to your web site’s server, WordPress doesn’t automatically recognize them.
When you upload a file using the default WordPress media uploader, WordPress saves the file information inside the database. It then displays those files by fetching the information from your WordPress database.
Since these files were not uploaded via media uploader, WordPress does not have them stored in the database.
Let’s fix this.
The first thing you will need to do is install and activate the Add from Server plugin.
Upon activation, you need to visit Media » Add From Server page. By default, the plugin will look into /wp-content/ folder and display all the media files and folders it finds inside it. You can click on folders to open them and locate your uploaded media files.
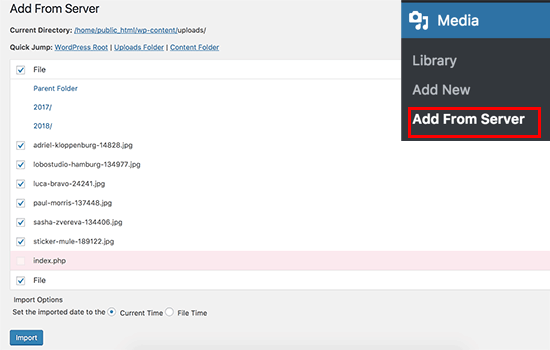
Once you have located the files you uploaded using FTP, simply click the checkbox next to them and then click on the ‘Import’ button.
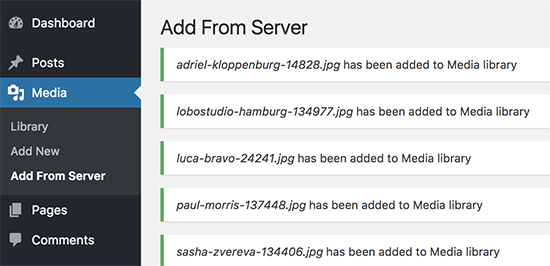
The plugin will start registering your imported media into the WordPress media library. You will see the progress on the screen as it goes through each file.
Once it is finished, you can visit Media » Library page to see all your imported files.
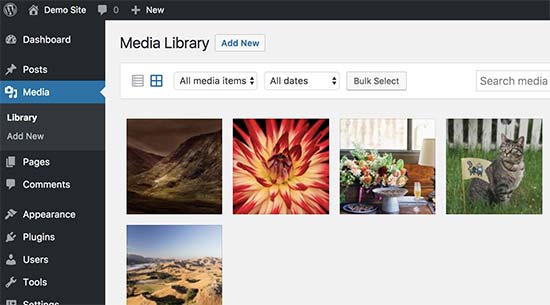
You can now go ahead and add these images, audio, and other media files to your WordPress posts and pages.
We hope this article helped you learn how to easily bulk upload WordPress media files using FTP.
