Do you want to create a pay-per-view site with WordPress? Building a pay-per-view site is a great way for content creators to make money online. In this article, we will show you how to create a pay-per-view site in WordPress and make money by selling content directly to your users.
How do Pay-Per-View Websites work?
Pay per view model allows content publishers to directly sell content to users. Instead of relying on advertising revenue, affiliate links, or other ways to make money, they can just allow users to pay for the content.
There are many different ways to create a pay per view website. Depending on how you want users to access the content, you can choose a pricing and delivery model that works best for you. For example:
- You can sell each item as the individual digital product
- You can create daily, weekly, or yearly passes for users to gain unrestricted access
- You can create subscription plans that drip content slowly instead of giving it all at once
You will need to decide which option is best for your business.
After you have chosen the model, you need to follow our step by step guide on how to make a WordPress website.
Once you have a WordPress website, let’s take a look at how you can turn it into a pay per view site where you can do all of the above and then some more.
Creating A Pay-Per-View Site in WordPress with MemberPress
For this tutorial, we will be using the MemberPress plugin. It is the best WordPress membership plugin in the market because it allows you to create robust membership websites with subscription plans and multiple ways to accept payments.
First, the thing you need to do is install and activate the MemberPress plugin.
Upon activation, you need to visit the MemberPress » Options page to configure plugin settings.
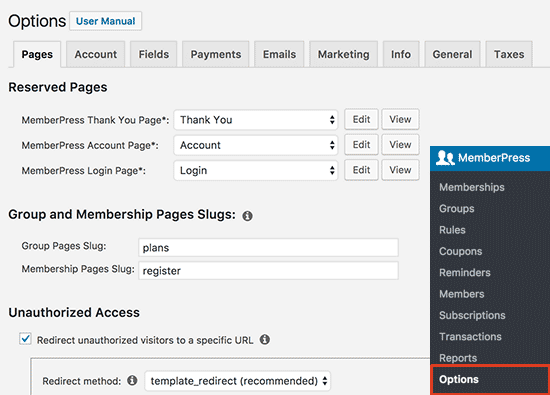
The options page is divided into different tabs. For a pay-per-view site, the default options would work out of the box, but feel free to review and change them.
You will need to set up the payment gateway in order to accept payments on your site.
You can do this by clicking on the ‘Payments’ tab and selecting your payment gateway.
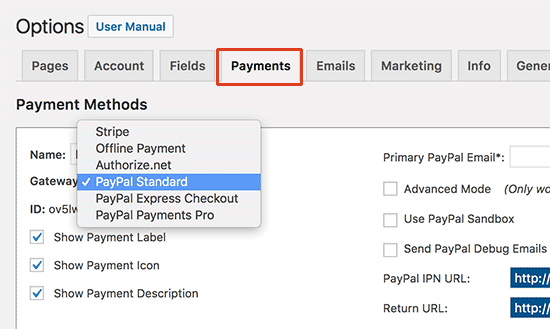
MemberPress supports PayPal (Standard, Express, and Pro), Stripe, and Authorize.net out of the box. You need to select the payment method you want to set up and provide the required credentials.
You can also set up multiple payment methods. To do that, click on the add button again and add another payment method.
Don’t forget to click on the ‘Update Options’ button to save your settings.
Creating Membership Levels
The next step is to set up membership levels. This is where you will create different pricing plans that your users can purchase.
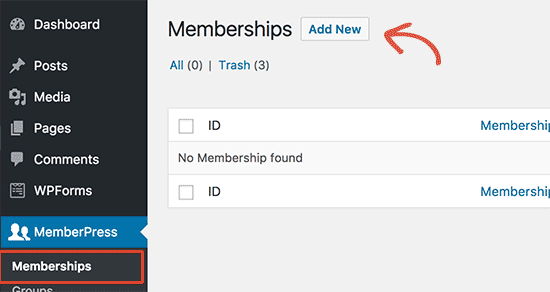
Head over to the MemberPress » Memberships page and then click on the ‘Add New’ button.
This will bring you to the edit membership page. First, you need to provide a title for this particular membership plan and then provide the plan details in the post editor.
Next, you need to set the pricing and expiration for this plan under the membership terms section.
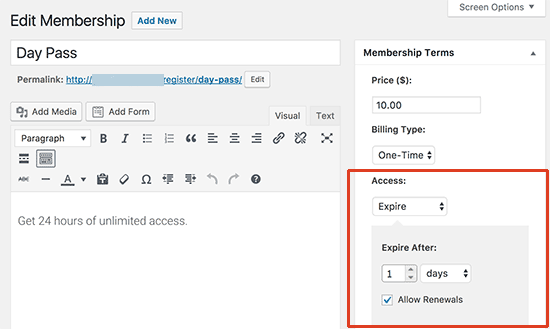
In this example, we are creating a membership plan that expires in 24 hours. We have also checked the ‘Allow renewals’ option, so users can renew their membership and buy the day pass again if they want to.
Now, scroll down to the membership options meta box below the post editor. This is where you can set up different options for this particular membership plan.
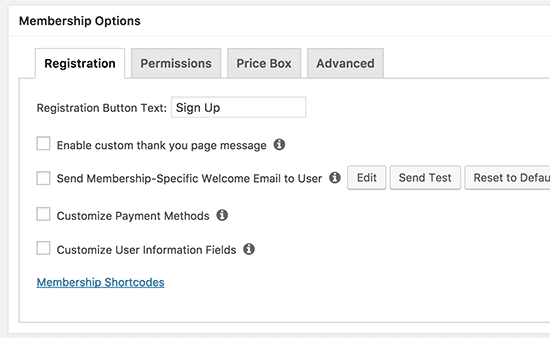
The default membership options will work for most sites. You need to click on the Price box tab and here you can provide the details you would want to show in the pricing box.
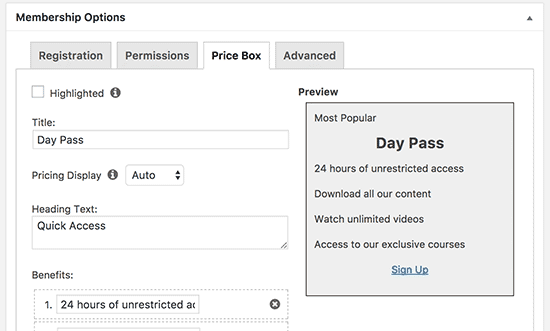
Once you are satisfied with the membership plan, click on the publish button to make it available.
Repeat the process to create other membership plans that you need such as weekly, monthly, or yearly plans.
Restricting Content to Membership Plans
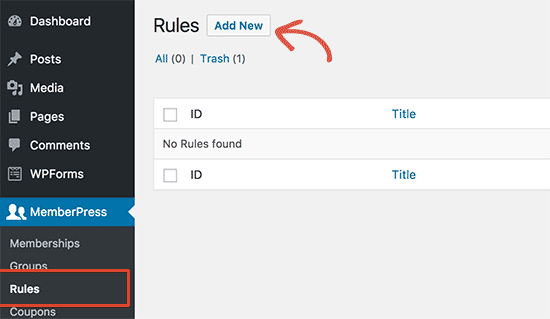
MemberPress also makes it super easy to restrict content to paid members only by creating rules.
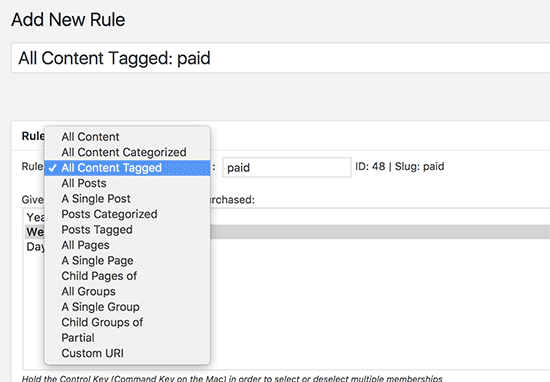
Visit MemberPress » Rules page and click on the ‘Add New’ button.
The rule edit page allows you to select conditions. If the content matches the condition, then you can select which membership plan gets access to it.
For example, you can select all content that matches a particular tag, category, a single post, a particular URL, and more.
You can create generic rules that apply to all content, or you can create very specific rules for individual items on your website.
Below the rules editor, you’ll see the content drip and expiration options.
Drip content allows you to gradually release content to users instead of giving it all away at once. If you are unsure about it at the moment, then you can leave it unchecked.
The expiration option makes the content unavailable after a defined period of time. Again, if you are not sure what to do, then you should leave it unchecked as well.
Don’t forget to click on the ‘Save Rule’ button to save your rule settings.
Repeat the process to create new rules as needed.
In the example above, we have made all content tagged ‘paid’ available to all membership plans. Now, we just need to add the paid tag to all the content that we want to put behind the paywall.
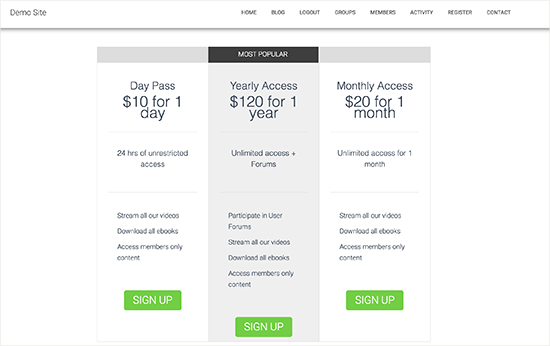
Creating a Pricing Page
MemberPress makes it super easy to display pricing and plans that users can purchase on your website. Let’s create a pricing plan page that shows users different membership plans that they can buy.
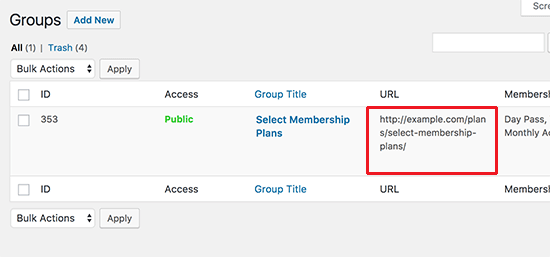
Head over to MemberPress » Groups page and click on the Add New button.

First, you need to provide a title for the group plan page. This will also be the title for the plans page that your users will see.
After that, scroll down to ‘Group options’ meta box. Here you can add the memberships that you want to display on the page.

You can also select a theme for your pricing table. MemberPress comes with a few ready-made designs to choose from.
Once you are finished, click on the ‘Publish’ button to make your plan public. If you click on the ‘View Group’ link after publishing it, then you will be able to see your pricing and plan page.
Redirecting Users to Pricing and Plans Page
Now we want unauthorized users to be redirected to the pricing page when they try to access our restricted content.
First, you need to visit the MemberPress » Groups page and copy the URL of the group you created in the previous step.
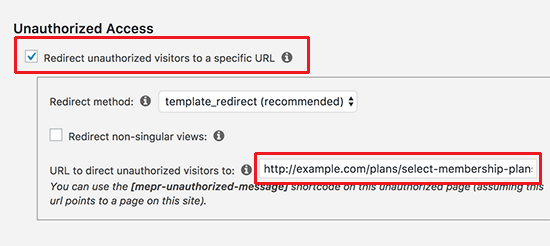
Next, head over to MemberPress » Options page and scroll down to the ‘Unauthorized Access’ section. You need to check the box next to ‘Redirect unauthorized visitors to a specific URL’ option and then paste the group URL you copied earlier.
Don’t forget to click on the ‘Update Options’ button to save your changes.
Now all users who try to access restricted content will be redirected to the pricing and plan page you created as a group.
Taking Your Pay-Per-View Website to the Next Level
MemberPress is a powerful plugin with tons of amazing features and lots of add-ons to further extend your pay per view site.
You can integrate it with LearnDash to sell courses online. Connect it to your email marketing services like AWeber or Constant Contact. You can even integrate it into an existing eCommerce store using the WooCommerce add-on (see: best WooCommerce hosting comparison).
We hope this article helped you learn how to create a pay-per-view site with WordPress.
