
What is an Autoblog in WordPress?
Autoblog or an automated blog is a website that automatically pulls content from other websites using RSS feeds.
Mainly the term is associated with content-scrapers and spam blogs. However, there are many perfectly good and profitable usage scenarios for auto blogging tools.
For example, an Autoblog can be used to create a curated website that gathers news on specific topics and then presents them under one roof. An Autoblog can also be used on company intranets and private websites.
Having said that, let’s take a look at how to create an Autoblog in WordPress.
Creating an Autoblog in WordPress
The first thing you need to do is install and activate WP RSS Aggregator plugin.
The basic plugin is free, but for this tutorial, you will need to be paid add-ons in the Advanced Feeds Bundle.
The pricing starts from $139 for a single site license with one year of support and updates.
Once you have installed and activated all the add-ons, simply visit RSS Aggregator » Add New to add a new feed source.
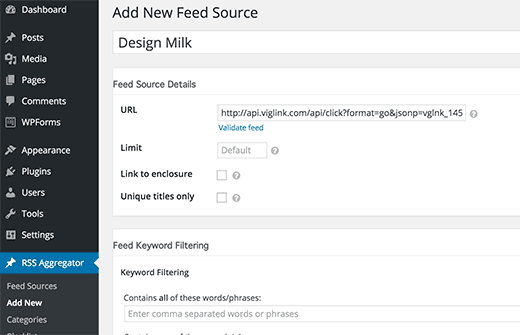
First, you need to provide this feed source a title and then provide the RSS feed URL.
Next, you need to scroll down a little to the ‘Feed to Post’ section. Here you need to select a post type for imported feed items.
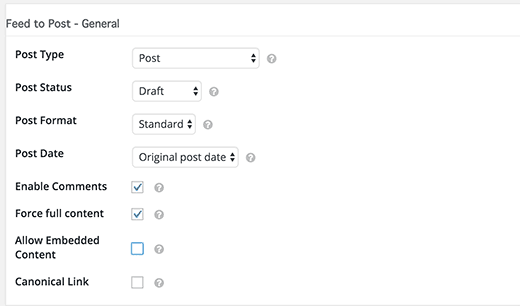
By default, the plugin will import posts as the draft. If you want, then you can change that to published.
Don’t forget to check the box next to ‘Force full content’ option. Using this option will allow WP RSS Aggregator to fetch the full text of posts.
Next, you need to set up ‘Feed to post – images’ section. This is where you set up how your Autoblog will handle images.
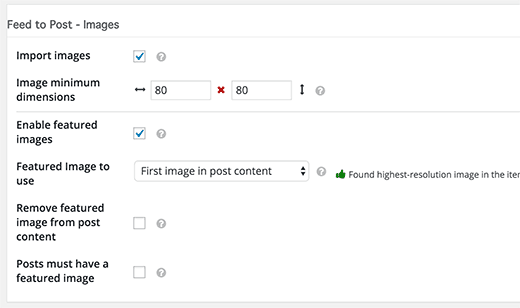
It can automatically import images from feed sources and store them in your WordPress media library. It can also fetch the first image in the content and use it as featured image. You need to set up these options to match your own needs.
The add new feed source page has many other options. You can review them and adjust them to meet your own needs.
You can use keyword filtering to import or exclude content matching certain keywords or tags. You can also add custom content before or after the source article.
Click on the Publish Feed button when you are done.
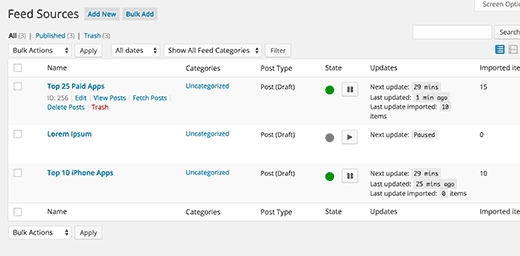
You can now visit your posts section, and you will see feed items imported into your WordPress site.
Repeat the process to add more feed sources if you need. You can check the status of your feeds by visiting RSS Aggregator » Feed Sources.
Quickly Adding Multiple Feed Sources For Your Autoblog
Adding each feed source, and configuring them one by one can be a tedious task. Here is how you can quickly add multiple feeds at once using the same settings.
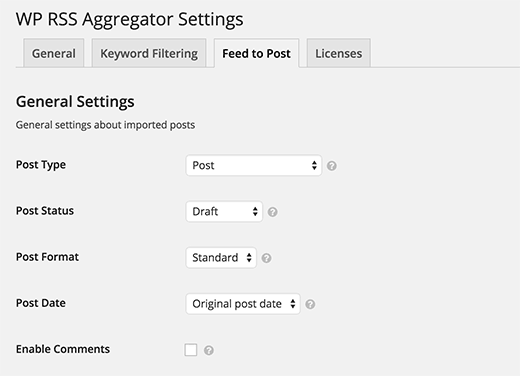
Go to RSS Aggregator » Settings and click on Feed to Post tab. Here you can configure the default settings for the feed to post addon.
These settings will be applied to all the feed sources that you add in the next step.
Next, you need to visit RSS Aggregator » Import & Export. Under the import box, you need to add name and URL of your feed sources.
A separate name and feed URL with a comma and space. Add one feed source per line.
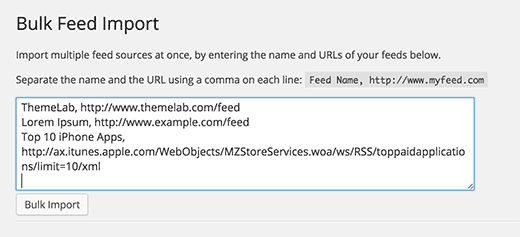
After that click on bulk import button to quickly add all the feed sources to your WordPress Autoblog.
That’s all, we hope this article helped you create an Autoblog in WordPress.
