Do you want to create WordPress backup using JetPack (formerly VaultPress)? VaultPress help you create automatic real-time WordPress backups and store them in the cloud. In case of a mishap, you can easily restore your WordPress website with just a few clicks. In this article, we will show you how to easily create real-time WordPress backup using JetPack (formerly VaultPress).
Why Use WordPress Backups by JetPack (VaultPress)?
VaultPress is one of the best WordPress backup plugins. It was rebranded to merge with JetPack, and it is now called JetPack Backups.
JetPack offers backups as a paid subscription service. Their pricing plans start from $39 per year for JetPack Personal (which is lower than what VaultPress cost previously). This plan comes with:
- Automated daily backups with unlimited storage
- 30-day backup archive
- Easy site-migration and 1-click restore
- Expert support provided by email
- and other powerful features like image CDN, lazy loading, etc.
We use VaultPress on WPBeginner for backups, and we have found it to be an extremely reliable solution. The primary reason why we use VaultPress is that they offer a seamless real-time backup solution which is very important for a large site like ours.
That being said, let’s take a look at how to create WordPress backups using JetPack (formerly VaultPress).
Creating WordPress Backups Using JetPack (Formerly VaultPress)
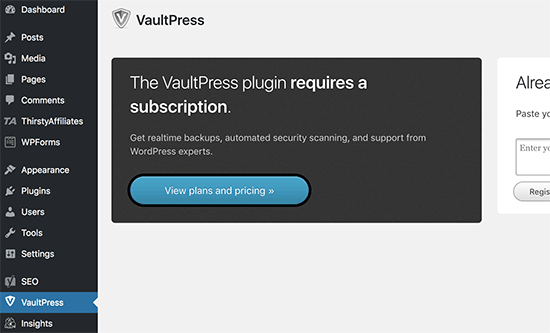
The first thing you need to do is install and activate the VaultPress plugin.
Upon activation, click on the VaultPress menu item in the WordPress admin sidebar. This will bring you to the plugin’s settings page. Click on the ‘View plans and pricing’ button to continue.
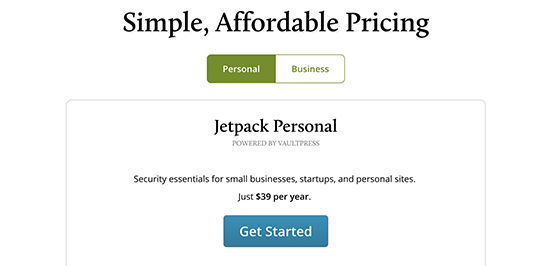
This will take you to VaultPress website where you will see pricing for JetPack Personal plan. Click on the Get Started button to continue.
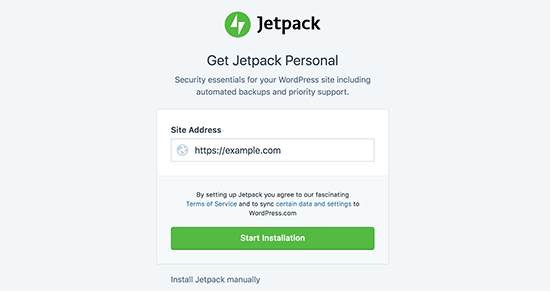
On the next screen, you need to enter your website address and then click on the ‘Start Installation’ button.
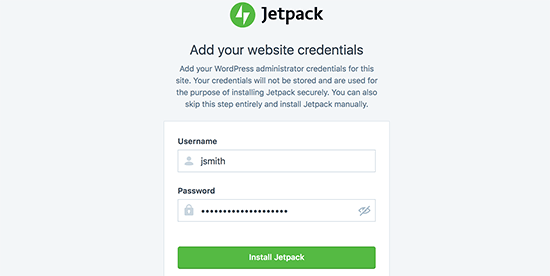
Next, you will be asked to provide your WordPress website’s administrator username and password. This information is used for installation and will not be stored anywhere.
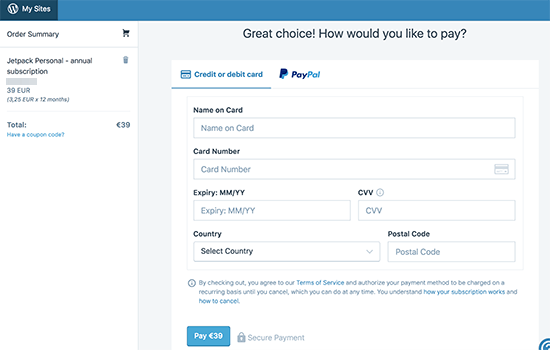
JetPack will now be automatically installed on your WordPress site, and you will be redirected to the payment page. After providing your payment information, click on the ‘Pay’ button to continue.
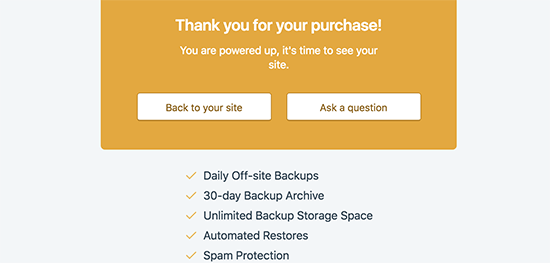
After payment, the setup will continue and automatically configure backups for your website. Once finished, you can click on the ‘Back to your site’ button.
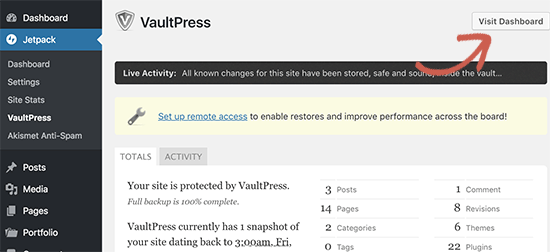
This will take you back to your WordPress website’s admin area. From here you need to visit JetPack » VaultPress page to view and manage your WordPress backups.
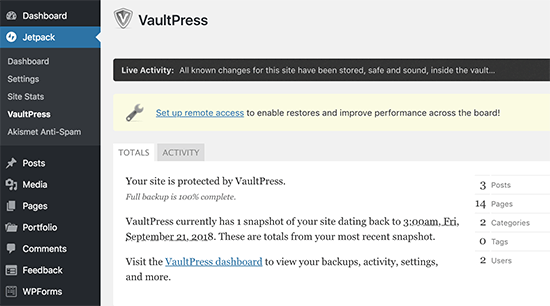
Note: Depending on the contents of your website, VaultPress may take a few minutes to finish the first backup before it appears on this page.
Giving VaultPress Access to Your Server
VaultPress needs access to your server to restore backups and be more efficient. To do that, you need to visit the VaultPress dashboard.
From here you need to visit the Settings page and enter your SSH or SFTP credentials. You can find this information in the email you received from your hosting provider when you signed up.
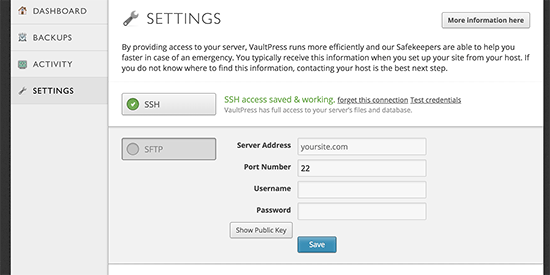
VaultPress will also ask you to add SSH Keys to your server. If you are on a shared hosting provider, then chances are that you don’t have access to create that file.
This file adds an additional layer of security. However, if you can’t add those SSH Keys, then VaultPress would still be able to connect to your server using SFTP information that you provided.
Don’t forget to click on the Save button to store your credentials.
Note: you can continue using Jetpack without providing access to your WordPress hosting server. The advantage of adding your SFTP access is that it helps VaultPress work more efficiently, and if you have a large site, then this will help you restore faster.
Restoring WordPress Backup by JetPack and VaultPress
VaultPress allows you to easily restore your WordPress site from a backup. Simply go to JetPack » VaultPress page and then click on the ‘Visit Dashboard’ button.

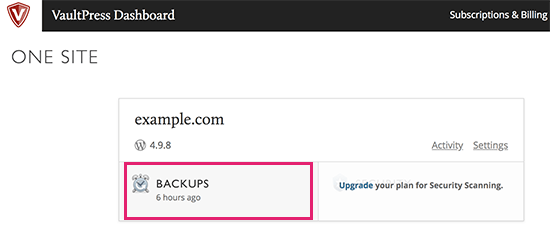
This will take you to your VaultPress dashboard where you need to click on ‘Backups’.
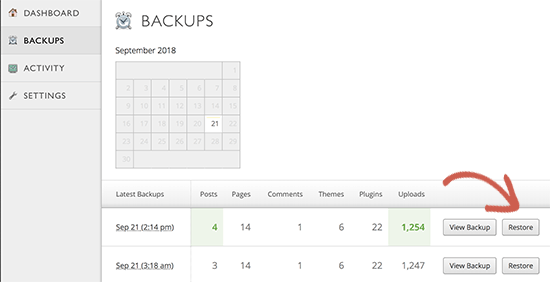
You will see a page showing your most recent backups. You can click on the restore button next to the backup that you want to restore.
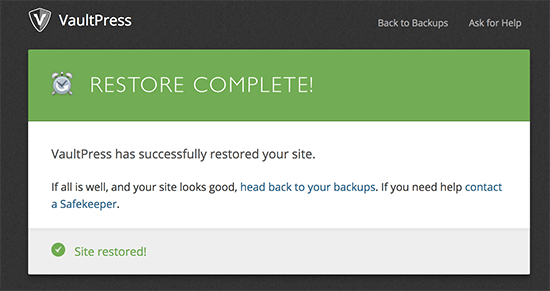
VaultPress will now prepare your backup to be restored, and you will be able to see the progress on screen.

Once finished, you will see a success message.
You can now go back to your WordPress site’s admin area to see if everything is working as expected.
We hope this article helped you learn how to create WordPress backup using JetPack + VaultPress.
