
Have you noticed how some popular blogs display announcements as a sticky bar on top of their site? Adding announcements to your site is an effective way to direct user attention and boost conversions. In this article, we will show you how to easily display announcements on your WordPress blog.
Why Add Announcements in WordPress?
Many popular blogs and websites display special announcements as a floating bar on top (or at the bottom). The reason why you are seeing more and more sites using the announcement bar is that they are highly effective.
Announcements are immediately noticeable on any website due to their placement. Usually, it is a full-width bar on either the top or the bottom of a page.

You can use it to offer special discounts, run time-sensitive marketing campaigns, ask users to participate in surveys, read a new blog post, etc.
You can also add visual effects, countdown timers, and email forms into your announcement bar.
Having said that, let’s take a look at how to easily add announcements in WordPress.
Method 1: Display Announcements in WordPress Using OptinMonster
We will be using OptinMonster in this method. It is the most popular lead generation tool in the market today.
Disclosure: OptinMonster is one of our premium products, and you will need the plus plan to access the floating bar option.
The first thing you need to do is install and activate the OptinMonster plugin.
This plugin merely acts as a connector between your WordPress site and the OptinMonster App.
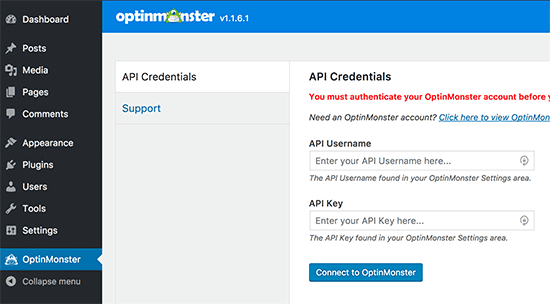
Upon activation, the plugin will add a new menu item to your WordPress site labeled ‘OptinMonster’. Clicking on it will take you to plugin’s settings page.
You will be asked to enter your OptinMonster API keys to connect your site. You can get this information from your OptinMonster account.
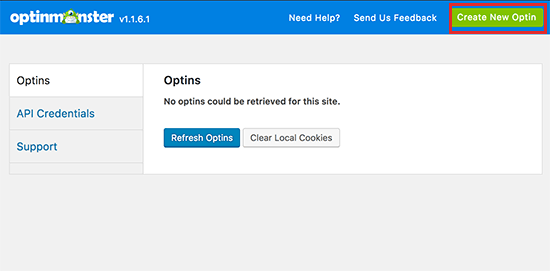
Now you are ready to create your first option. Click on OptinMonster menu in WordPress and then click on ‘Create New Optin’ button.
This will take you to OptinMonster website to create your first option.
You will start by giving a title to your campaign and adding your website. After that, you need to click on ‘Floating bar’ as your options bar.
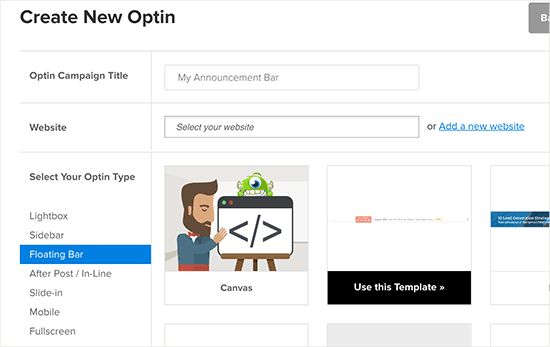
OptinMonster will load templates for a floating bar in the right-hand column. You need to select a template that best meets your need. Don’t worry, you can change almost every aspect of your template in the next step.
OptinMonster will now launch the customizer interface. Here you can design your announcement bar, edit your own message, email sign up form, special offers, etc. Simply click on an item in the floating bar to edit it.

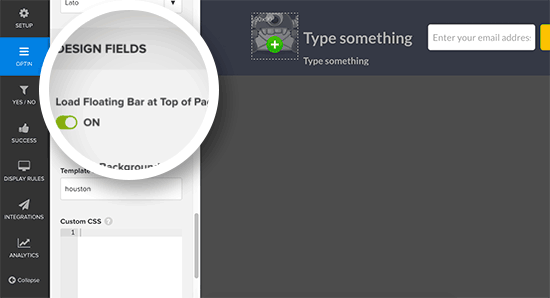
You can also reposition the floating bar and move it to the top so it appears similar to a Hello Bar.
To do this, scroll down to the Design Fields section, and here you can activate the ‘Load Floating Bar at Top of Page?’ option.
Once you are satisfied with the design you can click on the campaign button on top and select resume campaign.
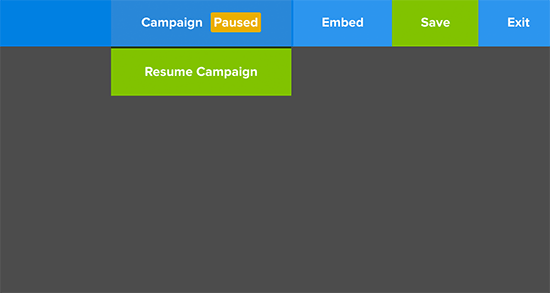
You can now click on the save button to store your settings and exit the option builder.
Now it is time to enable this floating bar on your WordPress site. Head over to your WordPress admin area and click on OptinMonster menu item.
You will see your newly created option appear under the options tab. If it doesn’t, then click on ‘Refresh Options’ button.
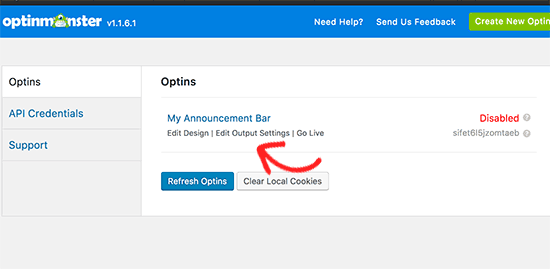
You still need to configure output settings. Click on the edit output settings link to continue.
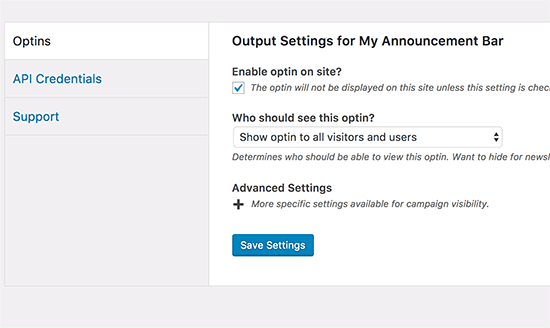
first, you need to select the checkbox next to ‘Enable option on site?’ option. After that, you can select who would see the option. You can show/hide it from logged in users or show it to all users and visitors.
You can also click on the advanced settings menu to expand it. This will show you the options to show or hide the announcement bar on certain pages and posts, or categories.
Don’t forget to click on the save settings button to store your settings.
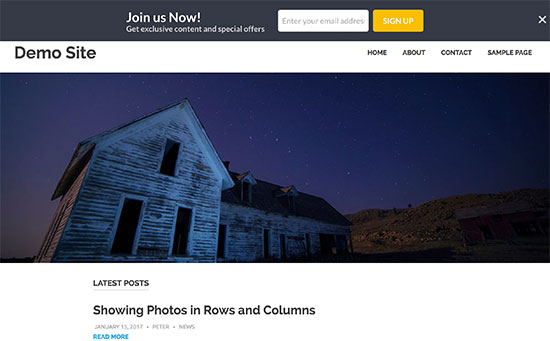
That’s all you can now visit your website to see your announcement bar in action.
Method 2: Display Announcements in WordPress Using Simple Notices
OptinMonster is a powerful tool with tons of options, like email form integration, timers, unlimited colors and designs, and powerful targeting controls.
However, if you just want to quickly show an announcement without using advanced features, then you can use this method.
First, you need to install and activate the Simple Notices plugin.
Upon activation, the plugin will add a new menu item labeled “Notices” in your WordPress admin sidebar.
To display a new notice on your site, you need to add it from Notices » Add New screen. Adding a new notice is very similar to adding a new post in WordPress.
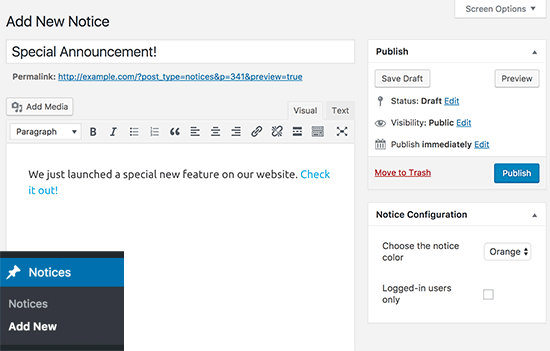
Provide a title for your announcement notice and enter the description. From the notice configuration metal box, you can select announcement bar color or show it to only logged in users.
Once you are done, click on the publish button to make your announcement live.
You can now visit your website to see your announcement bar in action.

You may need to add custom CSS to your theme to modify the appearance of your announcement bar.
We hope this article helped you learn how to easily display announcements in your WordPress blog.
