Do you want to display WordPress posts in a grid layout? Most WordPress themes do not come with a grid layout display for your posts. In this article, we will show you how to display your WordPress posts in a grid layout on any theme without writing a single line of code.
When Do You Need a Grid Layout for WordPress?
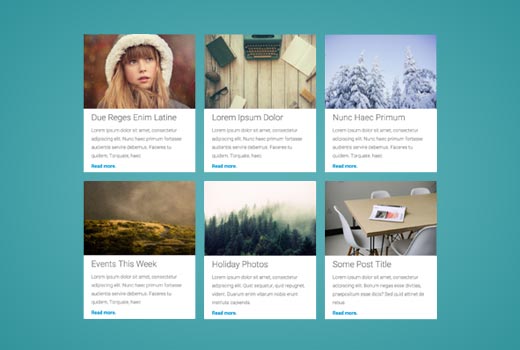
Traditional vertical layout of displaying posts works well for most websites. However, this layout can take up a lot of space especially if you want to display a large number of posts.
If you are using a custom homepage for your WordPress site, then you may want to use a grid-based layout to display your recent posts.
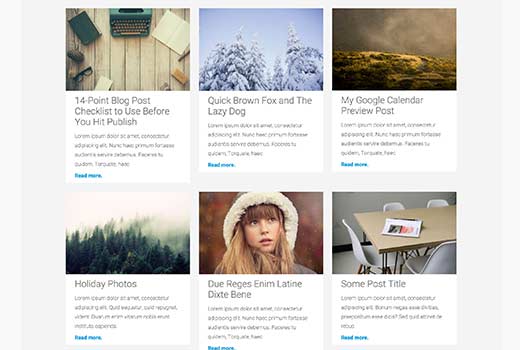
It will save space so that you can add other items to your homepage. It also looks more visually pleasant due to prominently displayed featured images.
WordPress themes designed for magazine or photography websites already use grid-based layout to display posts. However, if you are using a theme that doesn’t support it, then you will need to create your own template for that. This would require you to learn PHP, HTML, CSS, etc.
Let’s see how you can show WordPress posts in a grid layout on any theme without having to write any code.
The first thing you need to do is install and activate the Post Grid plugin.
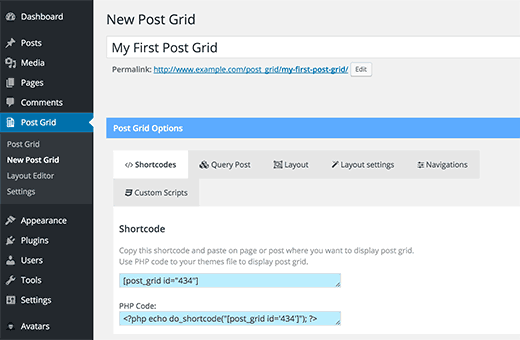
Upon activation, you need to visit the Post Grid » New Post Grid page to create your post grid.
The post grid page is divided into different sections presented by the tabs on the top row. First, you need to click on the ‘Query Post’ tab.
This is where you will define how you want the plugin to retrieve the posts for display.
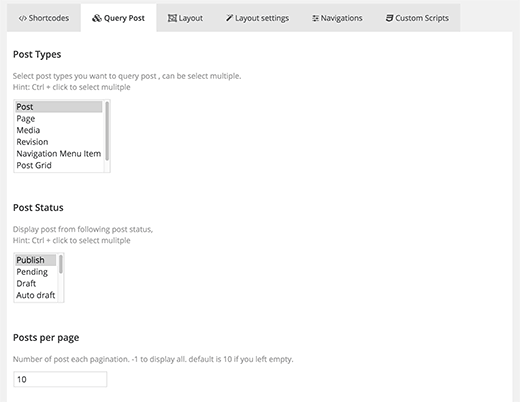
You can select the post type you want to display. By default, it will display ‘posts’ but you can choose pages if you want, or select any custom post type.
Next, you need to click on the layout tab. This is where you can select how you would want to display your grid.
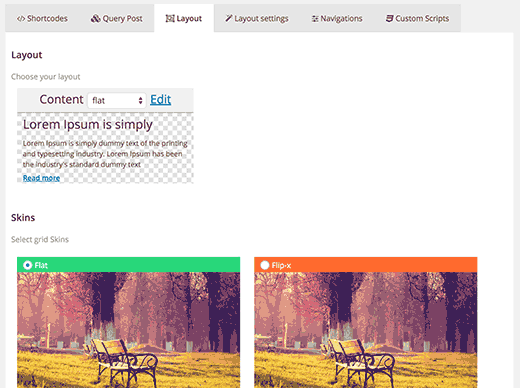
You can select the content layout. The plugin comes with a few choices like flat, flat center, flat right, etc. You can also click on the edit button and that will open the layout editor where you can create your own layouts.
You can choose from one of the 5 available skins. Some of the skins have cool visual effects that flip or rotate the image when a user takes mouse over to the thumbnail.
Now you need to click on the ‘Layout Settings’ tab. The settings here should work on most websites, but if your grid layout does not fit on your page, then this is where you can fix that.

Finally, click on the navigation tab and select your pagination style.
Once you are done, simply click on the publish button. This will make your post grid available, and you can add it to the page where you want to display post grid.
Adding Posts Grid in a WordPress Page
On the post grid editor, you will see the tab shortcodes. Clicking on it will display a shortcode.
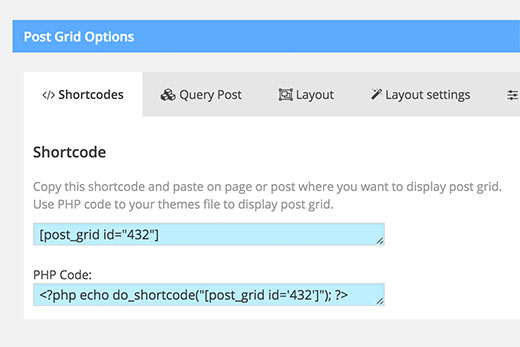
Copy the shortcode and edit the WordPress page where you want to display your post grid. Paste the shortcode inside the content area where you want to display the grid.
Next, save your page by clicking on the update button. You can now visit your website to see the post grid in action.
You can also use the PHP code if you want to add the post grid directly into your WordPress theme files.
That’s all we hope this article helped you display your WordPress posts in a grid layout.
