Do you want to install and setup Wordfence security plugin on your website? Wordfence is a popular WordPress plugin that helps you tighten the security of your WordPress site and protects it from hacking attempts. In this article, we will show you how to easily install and set up the Wordfence security plugin in WordPress.
What is Wordfence? How it Protects Your WordPress Site?
Wordfence is a WordPress security plugin that helps you protect your website against security threats like hacking, malware, DDOS and brute force attacks.
It comes with a website application firewall, which filters all traffic to your website and blocks suspicious requests.
It has a malware scanner that scans all your WordPress core files, themes, plugins, and upload folders for changes and suspicious code. This helps you clean a hacked WordPress site.
The basic Wordfence plugin is free, but it also comes with a premium version that gives you access to more advanced features such as country blocking, firewall rules updated in real time, scheduled scanning, etc.
Having said that, let’s see how to install and easily setup Wordfence for maximum security.
How to Install and Setup Wordfence in WordPress
The first thing you need to do is install and activate the Wordfence Security plugin.
Upon activation, the plugin will add a new menu item labeled Wordfence to your WordPress admin bar. Clicking on it will take you to the plugin’s settings dashboard.
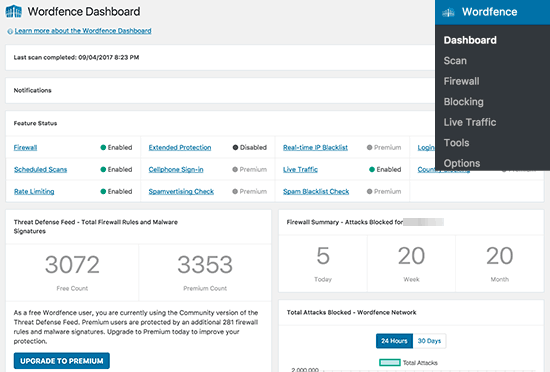
This page shows an overview of the plugin’s security settings on your website. You will also see security notifications and stats like recent IP blocking, failed login attempts, total attacks blocked, etc.
Wordfence settings are divided into different sections. The default settings will work for most websites, but you still need to review and change them if needed.
Let’s start by running a scan first.
Scanning Your WordPress Site Using Wordfence
Head over to Wordfence » Scan page and then click on ‘Start a Wordfence Scan’ button.
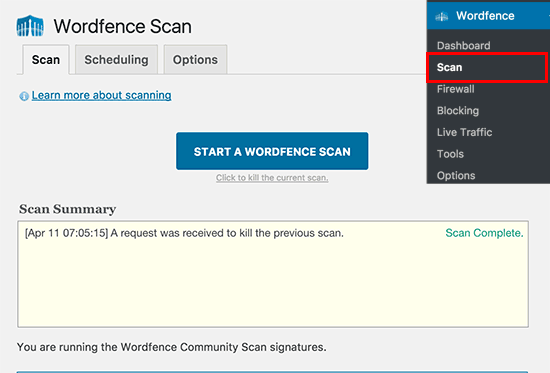
Wordfence will now start scanning your WordPress files.
The scan will look for changes in file sizes in the official WordPress core and plugin files.
It will also look inside the files to check for the suspicious code, backdoors, malicious URLs, and known patterns of infections.
Typically these scans need a lot of server resources to run. Wordfence does an excellent job of running the scans as efficiently as possible. The time it takes to complete a scan will depend on how much data you have, and the server resources available.
You will be able to see the progress of the scan in the yellow boxes on the scan page. Most of this information will be technical. However, you don’t need to worry about the technical stuff.
Once the scan is finished, Wordfence will show you the results.
It will notify you if it found any suspicious code, infections, malware, or corrupted files on your website. It will also recommend actions you can take to fix those issues.
Free Wordfence plugin automatically runs full scans on your WordPress site once every 24 hours. Premium version of the plugin allows you to set up your own scan schedules.
Setting up Wordfence Firewall
Wordfence comes with a website application firewall. This is a PHP based application level firewall.
The Wordfence firewall offers two levels of protection. The basic level which is enabled by default allows the Wordfence firewall to run as a WordPress plugin.
This means, that the firewall will load with the rest of your WordPress plugins. This can protect you from several threats, but it will miss out on threats that are designed to trigger before WordPress themes and plugins are loaded.
The second level of protection is called extended protection. It allows Wordfence to run before the WordPress core, plugins, and themes. This offers a much better protection against more advanced security threats.
Here is how you would set up the extended protection.
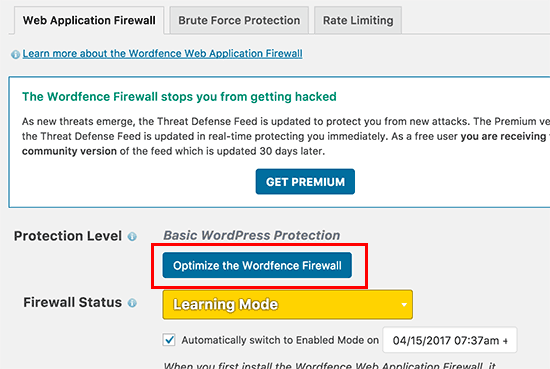
Visit Wordfence » Firewall page and click on the Optimize Firewall button.
Wordfence will now run some tests in the background to detect your server configuration. If you know that your server configuration is different from what Wordfence has selected, then you can select a different one.
Click on the continue button.
Next, Wordfence will ask you to download your current .htaccess file as a backup. Click on the ‘Download .htaccess’ button and after downloading the backup file click on the continue button.
Wordfence will now update your .htaccess file which will allow it to run before WordPress. You will be redirected to the firewall page where you will now see your protection level as ‘Extended protection’.
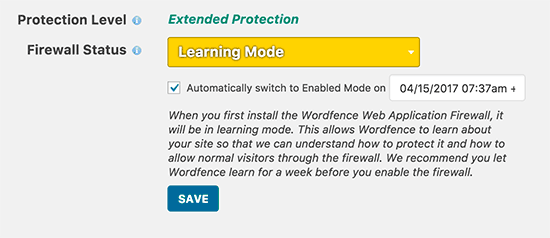
You will also notice a ‘Learning Mode’ button. When you first install Wordfence, it attempts to learn how you and your users interact with the website to make sure that it doesn’t block legitimate visitors. After a week it will automatically switch to ‘Enabled and Protecting’ mode.
Monitoring and Blocking Suspicious Activity Using Wordfence
Wordfence shows a very useful log of all requests made to your website. You can view it by visiting the Wordfence » Live Traffic page.
Here you can see the list of IPs requesting different pages on your website.
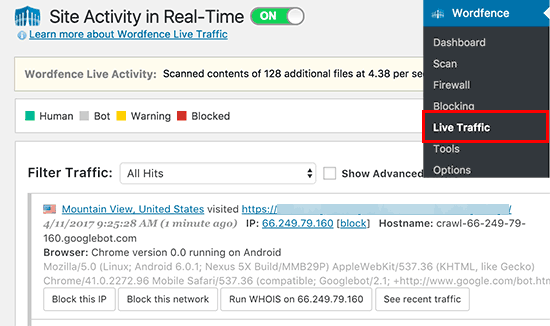
You can block individual IPs and even full networks on this page.
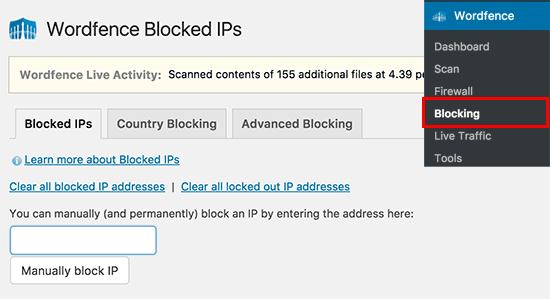
You can also block suspicious IPs manually by visiting the Wordfence » Blocking page.
Advanced Settings and Tools in Wordfence
Wordfence is a powerful plugin with lots of useful options. You can visit Wordfence » Options page to review them.

Here you can selectively turn features on and off. You can also enable or disable email notifications, scans, and other advanced settings.
On Wordfence » Tools page, you can run password audit to ensure that all users on your website are using strong passwords. You can run whois-lookup for suspicious IP addresses and view diagnostics information to help debug issues with the plugin or your WordPress site.
Premium version users can also set up two-factor login to strengthen login security on their websites.
Wordfence vs Sucuri – Which One is Better?
Now some of you will probably be thinking how Wordfence stacks against Sucuri?
Sucuri is another popular website security suite that comes with a website application firewall, malware scanner, and removal.
At WPBeginner, we use Sucuri. Check out our Sucuri review to see how it helped us block more than 450,000 WordPress attacks in 3 months.
Both Wordfence and Sucuri are great choices to improve your WordPress security. However, we believe that Sucuri has some features that give it a slight edge over Wordfence.
One of them is the website application firewall. Wordfence WAF is an application level firewall, which means it is initiated on your server.
On the other hand, the Sucuri website firewall is a DNS level firewall. This means all traffic to your website goes to their cloud proxy before reaching your website. This helps Sucuri block DDOS attacks more efficiently and also reduces server load on your website.
We hope this article helped you learn how to install and properly setup Wordfence on your website.
