Do you want to put your WordPress site in maintenance mode? The maintenance mode allows you to display a user-friendly notice to your users instead of a broken site during website maintenance. In this article, we will show you how to easily put your WordPress site in maintenance mode.
Why and When You Need to Put WordPress in Maintenance Mode
Normally, you can work on customizing your WordPress website without having to put it in maintenance mode. You can perform minor tweaks, publish new content, update themes and plugins without any downtime.
However, sometimes you may need to work on your website for a longer period. Like when you are manually setting up a new theme or configuring a new plugin that changes the behavior of your website. During this time your website may appear broken to your users for a period of time.
If your website has a lot of traffic, then you don’t want your users to see a broken website because it creates a bad user experience and give them a poor impression of your brand.
Putting your WordPress site in maintenance mode allows you to remedy that with a user-friendly notification, alternative links to visit, and provide a time frame for when the maintenance will be done. This creates a better user experience and a positive brand image among your users.
If you are working on a new website, then you can use the same concept to put your website in an under construction mode. This will allow you to build anticipation among your users and create hype for your upcoming website.
Having that said, let’s take a look at how to easily put your WordPress site in maintenance or under-construction mode.
We will show you two different plugins to create coming soon or maintenance mode pages. You can choose the one that works best for you.
1. Setup Maintenance Mode Using WP Maintenance Mode Plugin
The first thing you need to do is install and activate the WP Maintenance Mode plugin. For more details, see our step by step guide on how to install a WordPress plugin.
Upon activation, you need to go to Settings » WP Maintenance Mode to configure the plugin settings.
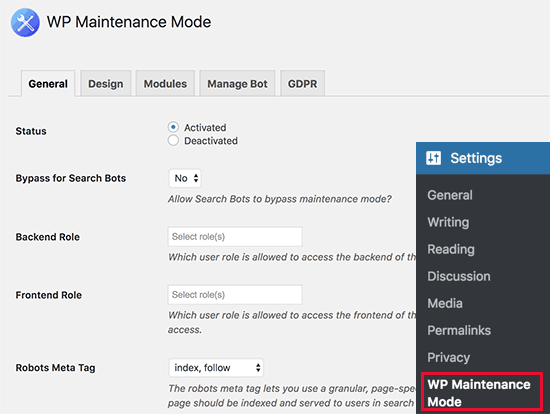
The plugin’s setting screen is divided into five tabs. By default, you will see the General options tab.
The first option under General is Status, which is set to Deactivated by default. In order to put your WordPress site into maintenance mode, you need to set it to ‘Activated’.
If you want search engines to be able to see your website while it is in maintenance mode, then you need to set ‘Bypass for Search Bots’ option to Yes. If you have an established website, then we recommend setting this to Yes.
WP Maintenance Mode allows you, the administrator, to have full access to your website during the maintenance mode. This means that you can see the working website and log in to your WordPress dashboard.
You can specify which user roles should be allowed to access the front and backend of the website while it is in maintenance mode. By default, it is set to Administrator only.
Other options on the page are self-explanatory. Once you are satisfied with the settings, you need to click on the Save settings button to store your changes.
Creating Your Own Splash Page for Maintenance Mode
WP Maintenance Mode allows you to create beautiful landing pages to display during maintenance mode. To create your splash page, simply click on the Design tab on the plugin’s settings page.
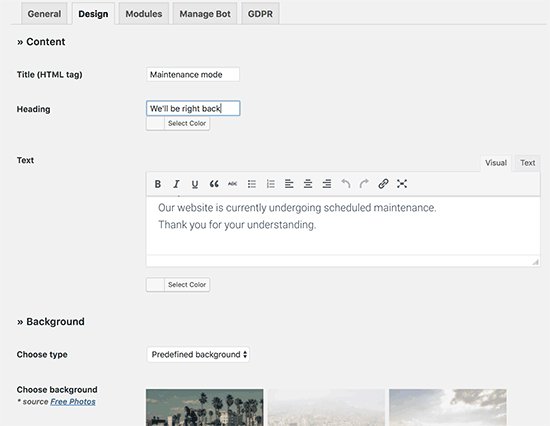
First, you need to provide a title, heading, and content to display on your maintenance page. If you are creating a coming soon page, then you can change the content accordingly.
Next, you need to select the text color and background type. You can choose from the background color, choose a pre-defined image, or upload your own background image.
Once you are done with the settings, don’t forget to click on the save changes button to store your settings.
Adding Countdown and Newsletter Signup on WordPress Maintenance Page
If you are putting WordPress in coming soon mode or just want to let users know when your site will be up, then you can use a countdown timer module that’s included with the plugin.
You can set it up by going to the Modules tab on the plugin’s settings page. From here you can select a start date and enter the remaining time.
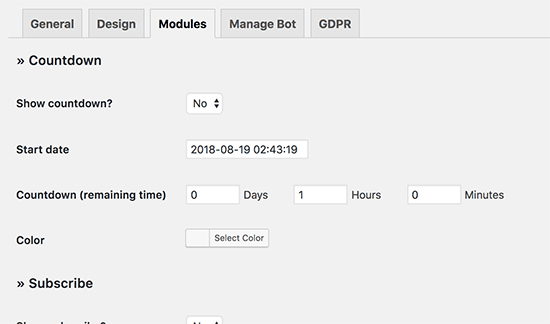
You can also allow users to subscribe and be notified when your website is back online. These users will be notified via the plugin, and they will not be subscribed to your email marketing list.

You want to make sure that your WordPress site is able to send emails. For more details, see our guide on how to fix WordPress not sending email issue to test and fix WordPress emails.
Next, you can also add links to your social media profiles in the coming soon mode or maintenance mode page. Simply enter your social media profile URLs, and the plugin will automatically display the social buttons.
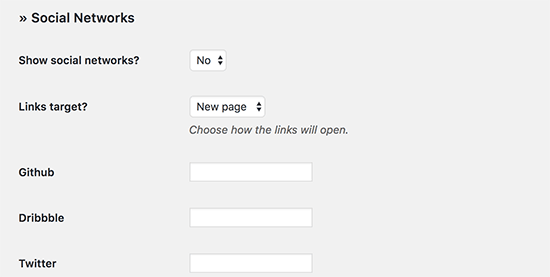
Optionally, you can also enable Google Analytics and add your tracking ID in the plugin settings.
Don’t forget to click on the save settings button to store your changes.
WP Maintenance mode also allows you to set up a pre-programed live chat bot which includes an interactive conversational help box. You can use this feature to politely ask users if they would like to subscribe.
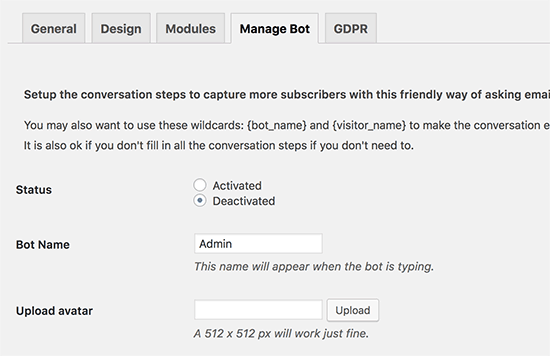
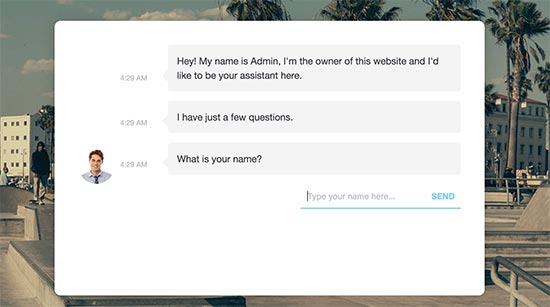
If you enable the bot, then it will hide the maintenance mode content you had set in the General settings page. This is how the chatbot would look on your website.
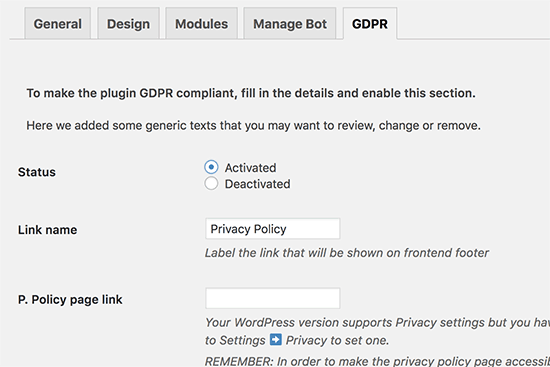
If you are collecting user data through the signup forms on your maintenance mode or coming soon mode page, then you would want to make it GDPR compliant.
You can do this by switching to the GDPR tab on the plugin’s settings page. From here you can enable the privacy module and select your privacy policy page.
You can now visit your website in a new browser window with the incognito mode, and you will be greeted with your maintenance mode or coming soon page.

2. Setup Maintenance Mode using SeedProd Plugin
SeedProd is a premium WordPress plugin that comes with beautiful designs and guaranteed support.
The first thing you need to do is install and activate the SeedProd plugin.
Upon activation, you need to visit you need to visit Settings » Coming Soon Pro page to set up coming soon or maintenance mode page.
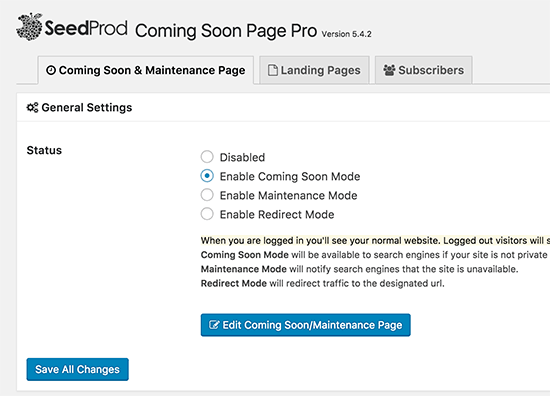
First, you need to select the status. You can select ‘Enable Coming Soon Mode’ or ‘Enable Maintenance Mode’. You can also select redirect mode which allows you to simply redirect your users to some other website.
After choosing maintenance or coming soon mode, click on the ‘Save all changes’ button.
Next, you need to click on ‘Edit Coming Soon/Maintenance Page’ button. This will open the SeedProd theme customizer.

You will now see a list of beautiful ready-made themes that you can use for your maintenance or coming soon page. Click to select a theme and SeedProd will show customization options for the theme.
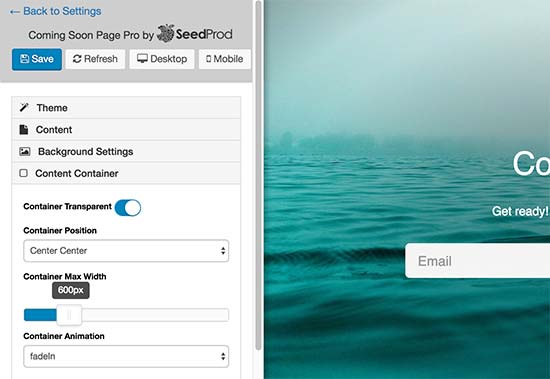
From here you can easily add your own logo, background, change content, add email subscription form, social sharing buttons, countdown timer, progress bar, etc.
SeedProd also supports all popular email marketing services. You can simply select your email service provider and set up a signup form by following on-screen instructions.
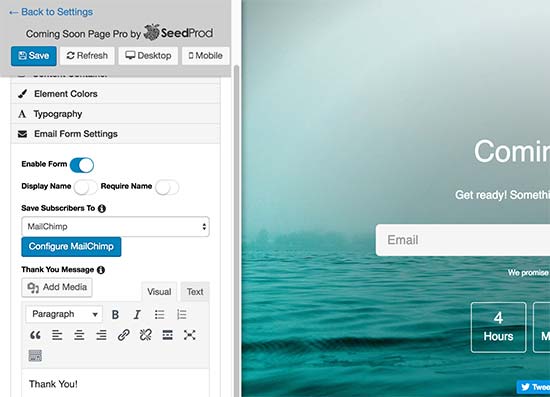
Once you are satisfied with the changes, don’t forget to click on the save button to store your changes. You can now visit your website in an incognito mode to preview your maintenance mode page in action.
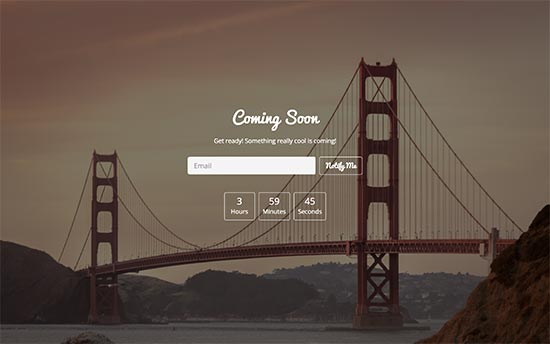
For more detailed instructions, see our article on how to create coming soon pages in WordPress with SeedProd.
We hope this article helped you learn how to easily put your WordPress site in maintenance mode.
