Did you know that you can use your WordPress contact form to grow your email list? Users are most engaged when they are trying to reach out using the contact form on your website. In this article, we will show you how you can use contact forms to grow your email list in WordPress.
Why Use Contact Forms for Email List Building in WordPress?
Email marketing is the most cost-effective way to reach your audience. If you haven’t started it yet, then you need to see our article on why you should start building your email list right away.
You will need to combine different tools and methods for encouraging users to signup. Offering multiple choices to sign up helps you quickly get more subscribers.
Many users focus on adding email signup forms to their websites, which is the good start but you need to get more creative. Contact forms, in fact, any kind of forms on your website are the perfect place to add an email signup option.
Here is why:
- Your users have already entered their email address in the contact form.
- They are already interested in what you have to offer, that’s why they are filling the form. Why not ask them to subscribe as well?
- Many users feel that their chances of getting a response will increase if they opted in for your email list
- You can use it in a variety of ways not just contact forms, but surveys, quizzes, ebook downloads, and more.
That being said let’s see how to easily integrate your email list to your WordPress forms and use contact forms to boost your email subscribers.
Connecting Your Email List to WordPress Contact Forms
The first thing you will need to do is install and activate the WPForms plugin.
It is a paid plugin, and you will need at least the Plus plan to access email marketing add-ons.
You can use this WPForms Coupon: WPB10 to get 10% off your purchase on any WPForms plan.
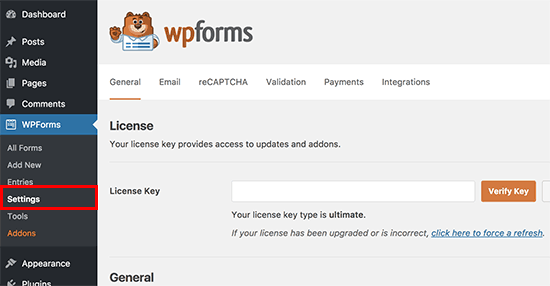
Upon activation, you need to visit WPForms » Settings page to enter your license key. This will enable automatic updates and give you access to respective add-ons.
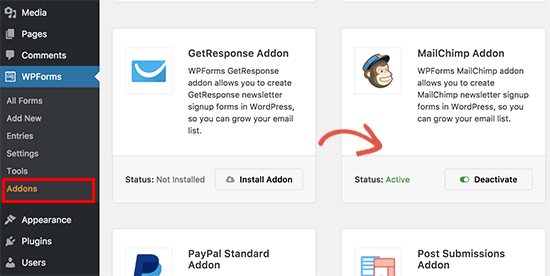
Next, head over to WPForms » Add-ons page to install the addon for your email marketing service.
WPForms comes with integration add-ons for the top email marketing services including Constant Contact, MailChimp, AWeber, and more.
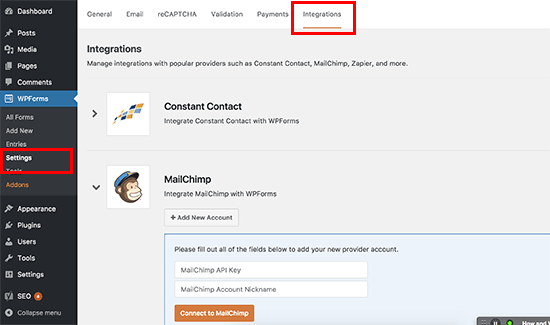
Once you have installed and activated the Addon, you need to visit WPForms » Settings page and click on the integrations tab. You will see your email service provider listed there.
Click on your email service provider name and enter the required credentials. You can find this information from your email service account.
Now that you have connected WPForms to your email marketing service, you can easily add email options into your forms and add them anywhere on your website.
Adding Email Signup Checkbox to Your Contact Forms
First, you need to create a simple contact form for your website.
Once you have created your form, the next step is to add an email sign up option into the same form. Click on the checkbox field from the fields column.

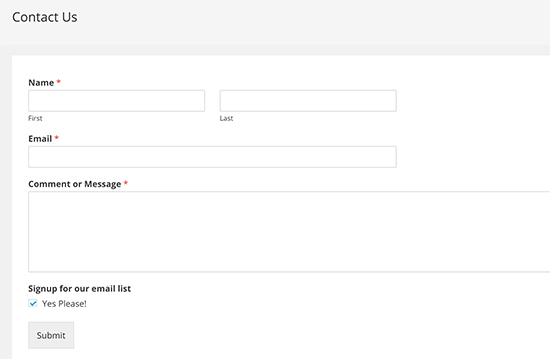
You will notice a new field added to your form with three checkboxes. Clicking on the field will open its settings. You need to remove the two checkboxes and change the field label to something appropriate like ‘Signup for our Email List’.
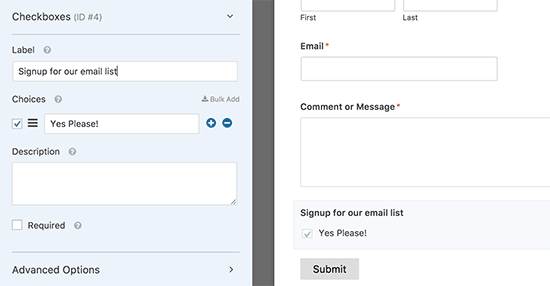
You can check the box next to the chosen field. Doing so, your email signup field will be checked by default.
Now your form is ready, we just need to tell it what to do when someone fills up the form.
You can do this by clicking on the ‘Marketing’ tab in the form builder. Here you need to select your email service provider and then click on the ‘Add New Connection’ button.
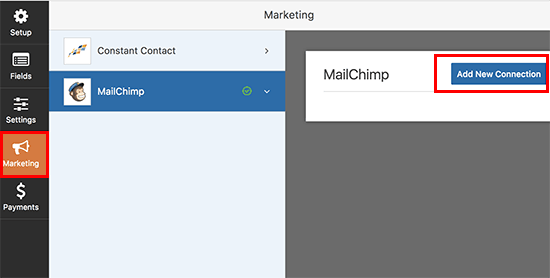
You will be asked to provide a name for this connection.
Next, WPForms will fetch your email service account. It will show the label you added for the account when you added it in the integrations.
It will also fetch email lists available under your email service account. You need to select the email list where you want to add users.
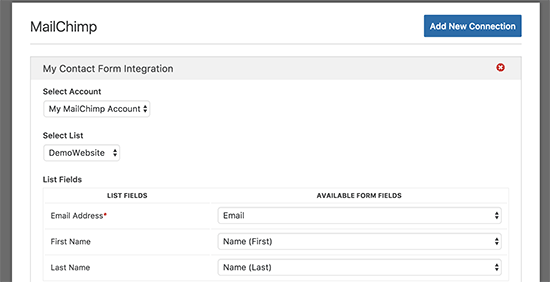
In the next section, you will be asked to map the form fields to your email service fields. After that, you need to click on the checkbox next to ‘Enable conditional logic’ option.
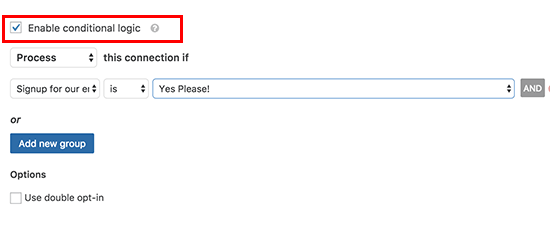
Select ‘Process’ this form if condition and then select your checkbox field and the checked reply.
Your contact form with email signup option is now ready. You need to click on the Save button at the top bar and then exit form builder.
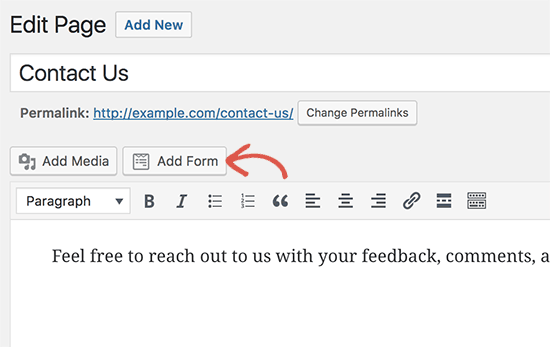
You can now add this form into any WordPress post or page. Simply click on the Add Form button when editing a post and then select your contact form.
Here is a preview of a contact form on our demo website with email sign up option.
Adding Email Subscription Checkbox to Other Forms
You can add email subscription checkbox to any form you create with WPForms. Here are a few creative ways to display forms and then you can add email subscription option to all these forms.
- Display a contact form in the lightbox popup
- Create a custom user registration form
- Create a slide our contact form in WordPress
- Allow users to submit posts to your WordPress blog
We hope this article helped you learn how to use contact forms to build your email list in WordPress.
