Do you want to import external images in WordPress? If you have recently moved your website from one platform to another, then there is a good chance that you may have external images embedded on your pages. In this article, we will explain how to properly import those external images in WordPress.
When and Why You Need to Import External Images?
External images are images embedded in your content that load from another website or URL different from your main site.
Most commonly, WordPress users come across external images issue after migrating their website from other platforms like Blogger, Weebly, Joomla, or WordPress.com.
By default, if you use one of the WordPress importers, then it will try to import images. You can see the imported images by visiting Media » Library page in your WordPress admin area.
If you see that all your images are already there, but the post URL is linking to the old source, then you don’t need this article. Instead, you need to update URLs using Velvet Blues Update URLs plugin.
However, if you don’t see images imported to your WordPress media library, then continue reading and we will show you how to import those external images.
Importing External Images in WordPress
The first thing you need to do is to install and activate the Auto Upload Images plugin. For more details, see our step by step guide on how to install a WordPress plugin.
Upon activation, you need to visit Settings » Auto Upload Images page to review the plugin settings.
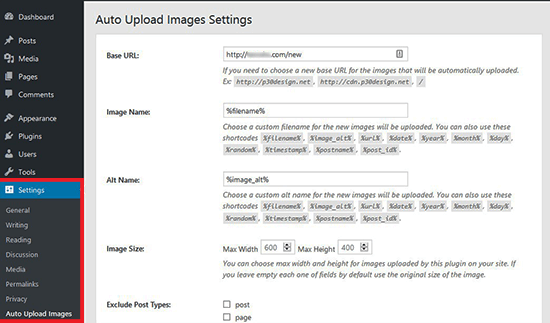
The default settings would work for most users, but you can change them as needed.
The plugin will import images to your default WordPress media uploads folder. You can change that by providing a different base URL. Other than that, it also allows you to set the filename, image alt tag, image size, and exclude post types.
Once you are done, don’t forget to click on the Save Changes button to store your settings.
Next, you will need to update the posts or pages containing the external images. Since this is a manual process, it can be tedious if you have a lot of content.
Luckily, there’s a quick way to update all posts with external images. Simply go to Posts » All Posts page and then click on the Screen Options button at the top.
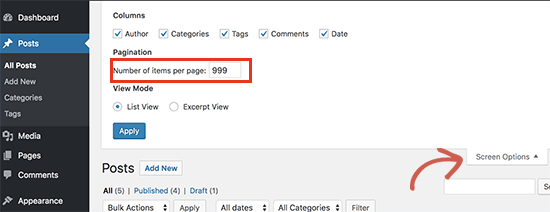
You need to increase the number to 999 in the ‘Number of items per page field’ field and click on the Apply button.
WordPress will reload the page, and this time it will show 999 posts at a time. Next, you need to select all your posts and then select Edit under the bulk actions menu.
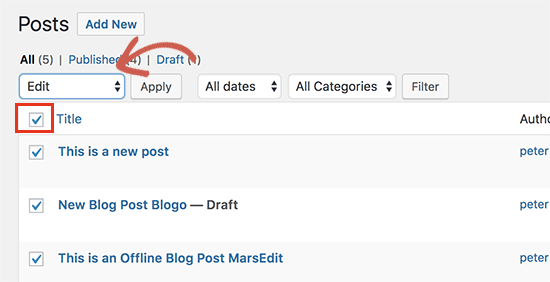
After that, you need to click the Apply button. WordPress will show you a quick edit box with all selected posts. You just need to click on the Update button, and WordPress will update all your posts.
Remember, don’t change any of the settings in the bulk edit settings that you see. You just need to click Update.
This process will trigger the plugin to check all selected posts and import external images as it finds them.
If you have more than 999 posts, then you will need to visit the next page to select remaining posts.
We hope this article helped you learn how to import external images in WordPress. You may also want to see our guide on how to fix common image issues in WordPress.
