
If you’re looking for a WordPress SEO plugin, then you will likely come across All in One SEO Pack because it is one of the most popular WordPress plugins ever created (over 27 million downloads). In this beginner’s guide, we will show you how to install, setup, and use All in One SEO plugin in WordPress.While WordPress provides
Why You Need a SEO Plugin for WordPress?
Search Engine Optimization (SEO) helps make your website rank higher in Google and other search engines.
While WordPress provides a SEO friendly setup right out the box, there are still many things that you can do to improve your SEO such as adding meta tags, generating XML sitemap, avoiding duplicate content, etc.
All in One SEO Pack helps you do all these things with an easy to use interface that blends into your WordPress dashboard.
Setting up All in One SEO Pack in WordPress
The basic All In One SEO plugin is available for free.
There is an All in One SEO Pack Pro version that adds additional features such as video sitemaps, eCommerce SEO, 1 year of professional support, and several other features. It costs $79 per year, and they are offering WPBeginner readers a $20 discount if you use our All In One SEO Pack coupon.
Having that said, let’s take a look at the setup process.
The
Upon activation, the plugin will add an All in One SEO menu item in your WordPress admin menu.
You need to click on All in One SEO » General Settings to configure the plugin settings.
On the settings page, you will notice a bunch of settings. Each setting option has a question mark next to it and clicking on it will show you a help message about the option and what it does.
The first option on the General Settings page is to set canonical URLs. Specifying a canonical URL for each post allows you to avoid duplicate content penalty from Google.
In a typical WordPress installation, a single post is displayed on several locations such as your homepage, archives page, author page, category and tag pages. That’s why we recommend using article summary or excerpts instead of full posts in WordPress archive pages. Publishing full articles on all pages creates duplicate content.
Homepage Settings
Under homepage settings section, you can specify a title for your homepage. This title can be different from your WordPress website’s title. You want to make it catchy and use your most important keywords in the title.
If you leave this field blank, then All in One SEO will use the default WordPress website title. Whether you use a different title or the same title as your blog, make sure that it contains your website’s main keywords.
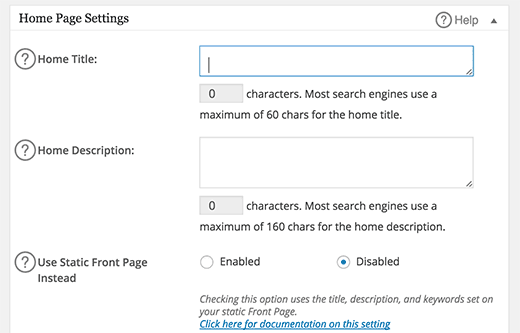
In the homepage description field, you need to provide a brief description of your website. Keep it under 156 characters and try to use your website’s most important keywords in the description. However do not go overboard with keywords in the description. You want to make sure that it is readable and easy to understand.
If you leave description field blank, then All in One SEO will not use them on your homepage. If you want to get maximum benefits, then you must fill these in.
If you are using a static front page, then you can click enable next to ‘Use Static Front Page Instead’. You can now edit your front page and add title and description under All in One SEO meta box.
Title Settings
Title settings allow you to set the default title templates for every page generated by WordPress. This could be a single post, main page, archives, tags, or category pages.
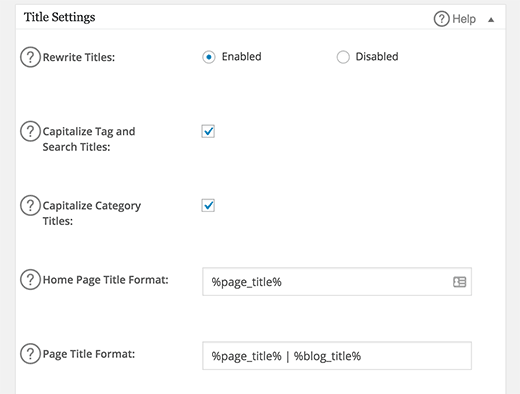
Each page generated by WordPress has a <title> set with in your WordPress theme files. The first option, rewrite titles, allows All in One SEO Pack to rewrite titles. It is enabled by default to override any theme settings.
We recommend that you leave this setting as is because we believe that themes should not add SEO options.
You can also modify how titles for your single, archive, and other pages appear by changing the predefined tags used for different page titles.
We would recommend leaving them as it is for optimal results. if you are creating a lot of landing pages, then the only thing you should change is your page title format. Get rid of | %blog_title% part from page title format, so your site title is not taking up your 60 character limit, and your entire page title shows up in search.
Custom Post Type Settings
Under custom post type settings, you can enable All in One SEO plugin for any custom post types used on your site.

For example, if you are using WooCommerce then your products are a custom post types and they will be shown here. You can enable the SEO options for products.
Not all post types will need Advanced SEO settings. For example, if you are using Envira Gallery plugin, then your galleries will appear here as a custom post type titled ‘Envira Galleries’. Since galleries are usually added into WordPress posts and pages, you don’t need to have advanced SEO option for them.
However if you’re using Envira’s standalone gallery addon to create standalone galleries, then yes you should enable SEO for that custom post type.
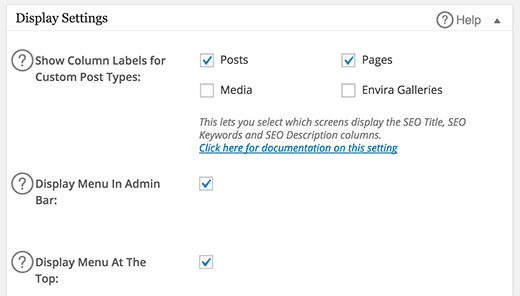
Display Settings
Display settings will allow you to show post’s SEO title and description on posts screen. It is enabled by default and you can leave this setting as it is.
Webmaster Verification
This is where you will add webmaster verification code provided by Google, Bing or Pinterest to verify ownership of your website.
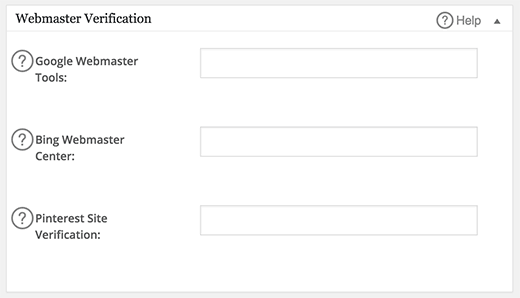
We highly recommend that you sign up for Google Webmaster Tools and Bing Webmaster Tools because it will help your SEO. Connecting your site will help these search engines to notify you when there is something wrong with your website.
These webmaster tools will also provide you with useful insights about your site, and your search engine rankings. You can then use that information to plan your content strategy and improve your site’s SEO.
If you use Pinterest to bring traffic to your WordPress site, then verifying your site with Pinterest will allow you to use Pinterest Analytics.
Google Settings
Under the Google settings section, you can enter your Google Plus profile URL to add google verified authorship. Once you add the link there, you must go to your Google+ profile about page and add your site in the contributors section. Refer to the authorship tutorial that we linked above.
Even though Google has discontinued using author profiles in search results, some SEO folks believe that having it is harmless if not useful.

You can also add your Google Analytics ID for your website, and All in One SEO will automatically add your Google Analytics code to your site.
Noindex Settings
This section allows you to disable indexing of category and archive pages on your site by search engines. Some SEO experts believe that this is duplicate content, and it is better not to get these pages indexed.
However, others argue that you should disable the ones that you don’t think are necessary and keep useful archives like category archives and tag archives. All in One SEO enables
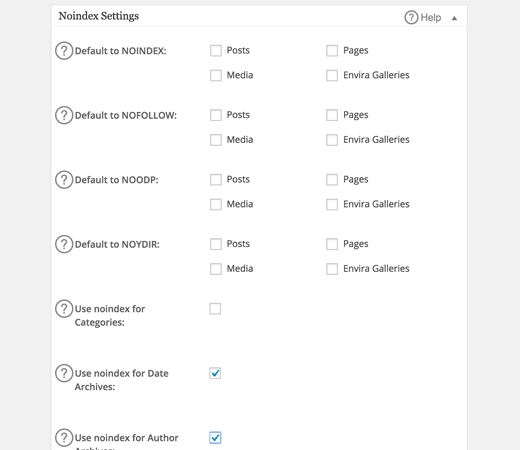
If you run a single author blog, then we recommend that you enable noindex for author archives too. But if you run a multi-author site, then you should let search engines index author archives.
Advanced Settings
Advanced settings section allows experienced webmasters to modify certain aspects of their website’s optimization. Like excluding pages, adding code to headers, auto-generate descriptions, and so on.
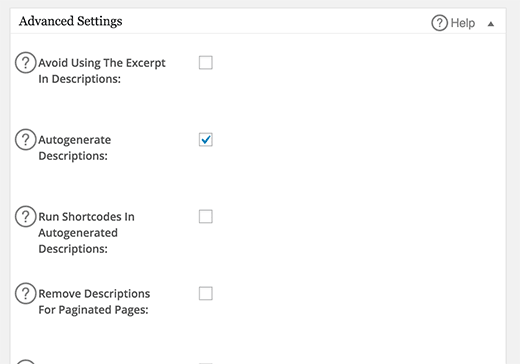
Unless you know what you are doing, we recommend you to leave this section as it is.
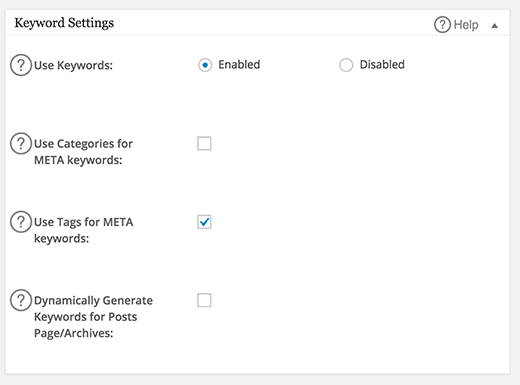
Keyword Settings
Many SEO experts believe that there is no benefit of using the meta keywords tag any more. On the other hand, some experts believe that they are still useful.
All in One SEO has keywords disabled by default. If you want to use keywords, then you can enable them here. We use meta keywords on our website because we believe that even if they are not useful, there is no harm in adding a few keywords with each post.
The Features Manager in All in One SEO
All in One SEO Pack is a powerful plugin, and as you have seen it has tons of options. Some of its features are not available to users out of the box. You will need to activate them by visiting All in One SEO » Features Manager page.
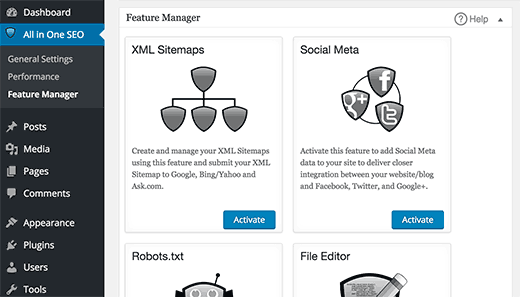
Creators of All in One SEO believe that some users may already be using other plugins for XML sitemaps and for Facebook Open Graph meta tags. If you are not already using other plugins for that, then you must activate these two add-ons to gain maximum SEO advantage.
Enabling these features will add Social Meta and XML Sitemap items under your All in One SEO settings.
XML Sitemap Settings in All in One SEO
All you need to do is visit All in One SEO » XML Sitemap page and check the box next to ‘Notify Google’ and ‘Notify Bing’ options.
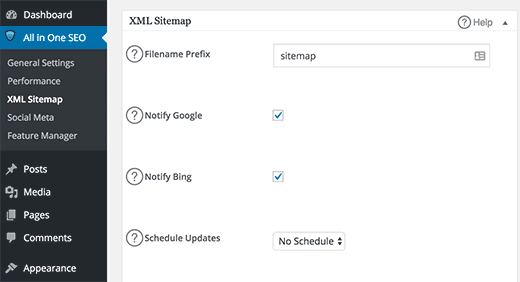
Leave rest of the settings as they are and click on the update options button.
Social Meta Settings in All in One SEO
First you need to visit All in One SEO » Social Meta page and Scroll down to the homepage settings section. This is where you will set the title, description, and an image for your site’s home page.
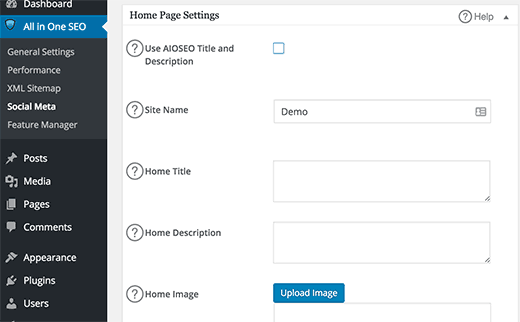
However, since we have already set homepage title and description in the General settings, you can check the box that says ‘Use AIOSEO Title and Description’.
Next you need to upload an image because this image will be used by social sites like Facebook and Twitter to accompany your link when it is shared on these platforms.
When you scroll down on this page, you will see the social profiles link section where you can add your social profile URLs one link per line.

The next section allows you to set up Facebook admin and app ID. Settings in this section will allow you to add Facebook author tag, and get Facebook Insights for your website.
Optimizing Posts and Pages with All in One SEO
All in One SEO plugin adds a meta box in your WordPress post/page edit screen. However, many beginners are often confused about how to use that properly.
What kind of title should I use? Or how to write a description?
So before you move on to setting up All in One SEO Pack, we would like you to check out our guide on how to properly use SEO functions to optimize your WordPress posts. Even though this guide shows Yoast SEO plugin in the screenshots, the basic concepts are the same, so it will be helpful for all.
To optimize single posts and pages, you can enter SEO title, description, and keywords for each post you write.
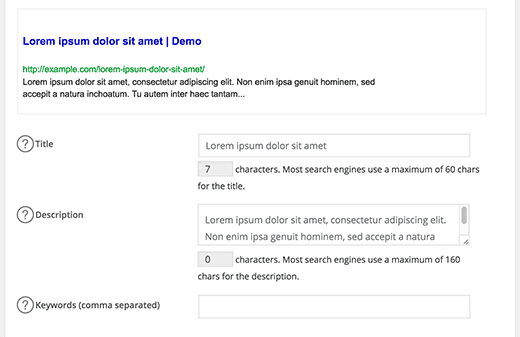
Settings on this meta box will override your global All in One SEO settings. If you leave them blank, then All in One SEO will use your global settings to fill in these fields for you.
It will use your post title as title, posts excerpt as description, and tags as keywords. If you want to get maximum results, then we recommend that you fill these fields manually rather than leaving them blank.
Apart from these, you can also set nofollow and noindex options if you do not want to get a specific post or a page indexed on search engines. For beginners, its best to avoid using these options.
Lastly, you can even disable All in One SEO for a particular post or page, but we’re not sure why you would want to do that.
That’s all you have optimized your single post or page for maximum SEO benefit.
We hope this user’s guide for All in One SEO Pack helped you set it up on your site.
